Guide to Baking the BEST Cherry Pie Bars
Okay, let’s be honest. We all love the idea of a beautiful, towering cherry pie bars recipe. The flaky crust, the bubbling sweet-tart filling – it’s practically the American dessert dream. But then reality hits. Soggy bottoms, runaway filling, lattice crust anxiety… it can all feel a little overwhelming.
But fear not, fellow dessert devotees! I’m here to introduce you to your new best friend in the world of cherry goodness: Cherry Pie Bars Recipe! Think of them as the cool, laid-back cousin of the traditional pie. All the glorious cherry flavor and delightful textures, packed into easy-to-slice, portable squares. No fussy crimping, no precarious wedge-serving. Just pure, unadulterated cherry happiness.
And the best part? They’re surprisingly simple to make! So, ditch the pie-induced stress and get ready to bake up a batch of these absolutely irresistible Cherry Pie Bars. Trust me, your taste buds (and your sanity) will thank you.
Why Cherry Pie Bars Recipe Are Your New Dessert BFF:
Before we dive into the delicious details, let’s take a moment to appreciate why these bars are a game-changer:
- Effortless Elegance: They look impressive without requiring years of pastry chef training. The simple press-in crust and crumble topping are incredibly forgiving.
- Portion Control (Kind Of): Being pre-sliced, they make serving a breeze and help manage those “just one more slice” moments (though no judgment if you go back for seconds!).
- Perfect for Sharing: Bake them in a standard pan and you’ve got a crowd-pleasing dessert ready for potlucks, picnics, or just a cozy night in.
- Freezer-Friendly: Make a batch ahead of time and freeze for a future sweet craving emergency. Just thaw and enjoy!
- Customizable: While we’re focusing on classic cherry, you can easily adapt this recipe for other fruit fillings.
Let’s Talk Cherries: Fresh, Frozen, or Canned?
The heart of any cherry pie (or bar!) is, of course, the cherries. So, what kind should you use? Here’s a quick rundown:
- Fresh Cherries: If you’re lucky enough to have access to fresh, ripe cherries during their season, go for it! You’ll need to pit them, which can be a little time-consuming, but the flavor is unbeatable. Sweet cherries like Bing or Rainier work wonderfully.
- Frozen Cherries: These are a fantastic year-round option. They’re usually pre-pitted and often picked at their peak ripeness. Just be sure to thaw them completely and drain any excess juice before using them in the filling.
- Canned Cherry Pie Filling: For ultimate convenience, canned cherry pie filling is a perfectly acceptable choice. It’s already sweetened and thickened, saving you a few steps. However, keep in mind that the flavor and texture might not be quite as vibrant as with fresh or frozen cherries.
For this recipe, we’ll be focusing on using frozen cherries for their ease and consistent quality.
The Star Players: Your Ingredients List
Alright, let’s gather our baking superheroes! Here’s what you’ll need to create these delightful cherry pie bars recipe:
For the Crust & Crumble Topping:
- 2 ½ cups all-purpose flour: The foundation of our buttery goodness.
- ¾ cup granulated sugar: For a touch of sweetness in the crust and crumble.
- 1 teaspoon salt: Enhances the flavors and balances the sweetness.
- 1 cup (2 sticks) unsalted butter, cold and cut into cubes: Cold butter is KEY for a flaky crust and crumbly topping.
- 1 large egg: Helps bind the crust together.
- 2 tablespoons ice water: Adds moisture and helps create a tender crust.
For the Cherry Filling:
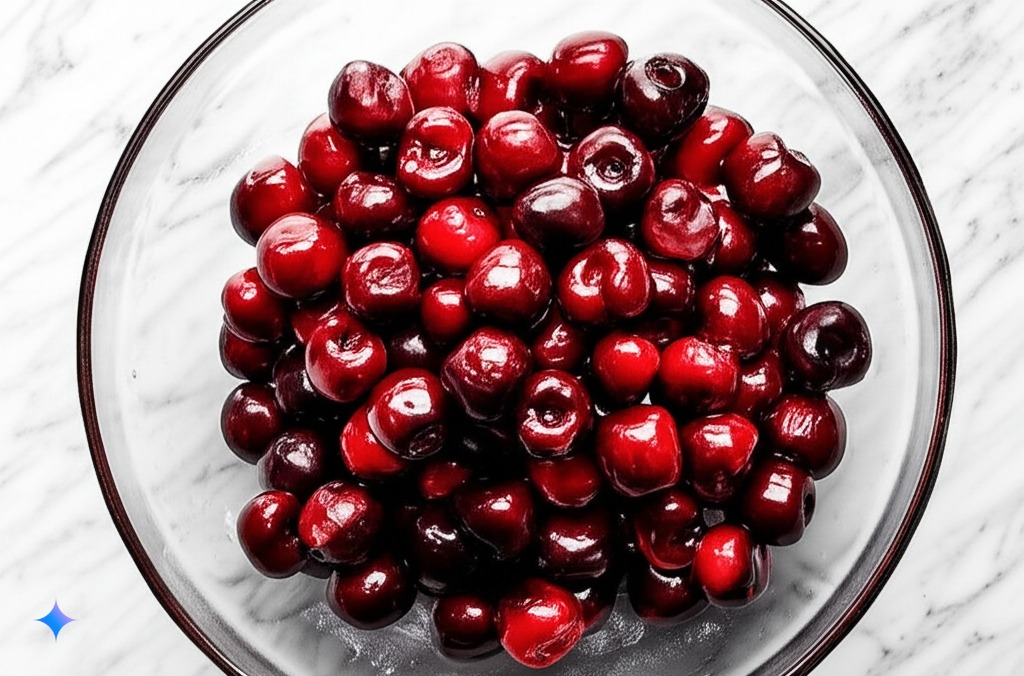
- 6 cups frozen pitted cherries, thawed and drained: Our star ingredient! Make sure to drain them well to avoid a soggy bottom.
- ½ cup granulated sugar: Adjust to your preference depending on the sweetness of your cherries.
- ¼ cup cornstarch: Our thickening agent to create that perfect, gooey filling.
- 1 tablespoon fresh lemon juice: Brightens the cherry flavor and adds a touch of tanginess.
- 1 teaspoon pure vanilla extract: Enhances the overall flavor profile.
- ½ teaspoon almond extract (optional): Adds a lovely subtle nutty note that complements cherries beautifully.
Optional but Recommended:
- Coarse sugar or sanding sugar: For sprinkling on top of the crumble for extra sparkle and texture.
- Powdered sugar: For dusting the cooled bars for an elegant finishing touch.
Let’s Get Baking! Step-by-Step to Cherry Pie Bars Recipe Perfection
Now for the fun part! Follow these simple steps, and you’ll be sinking your teeth into a delicious cherry pie bar in no time.
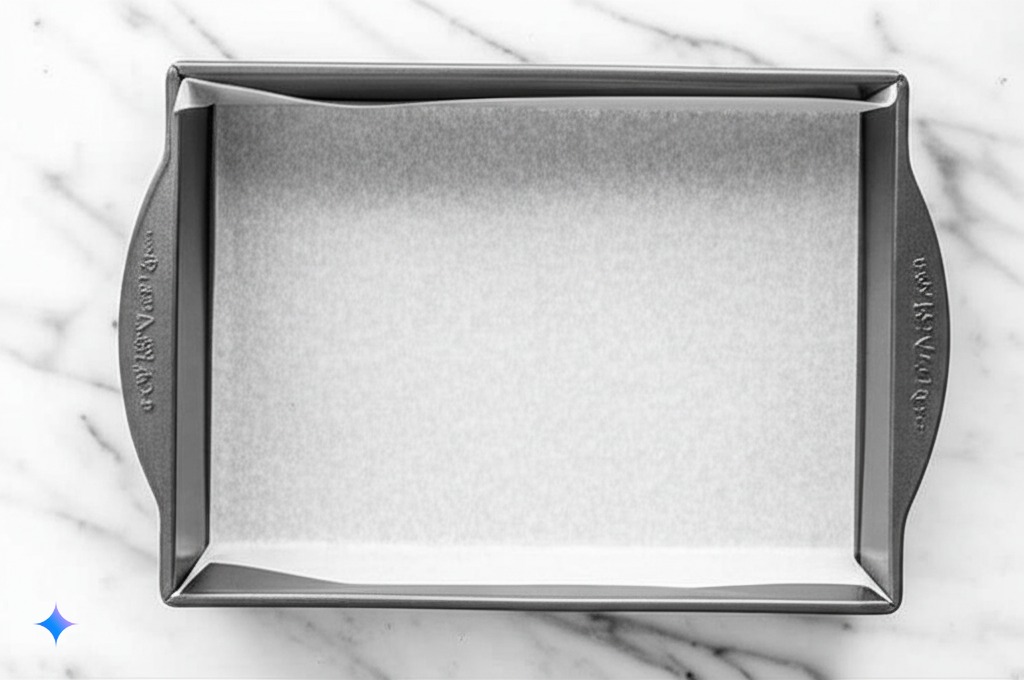
Step 1: Prepare Your Baking Pan
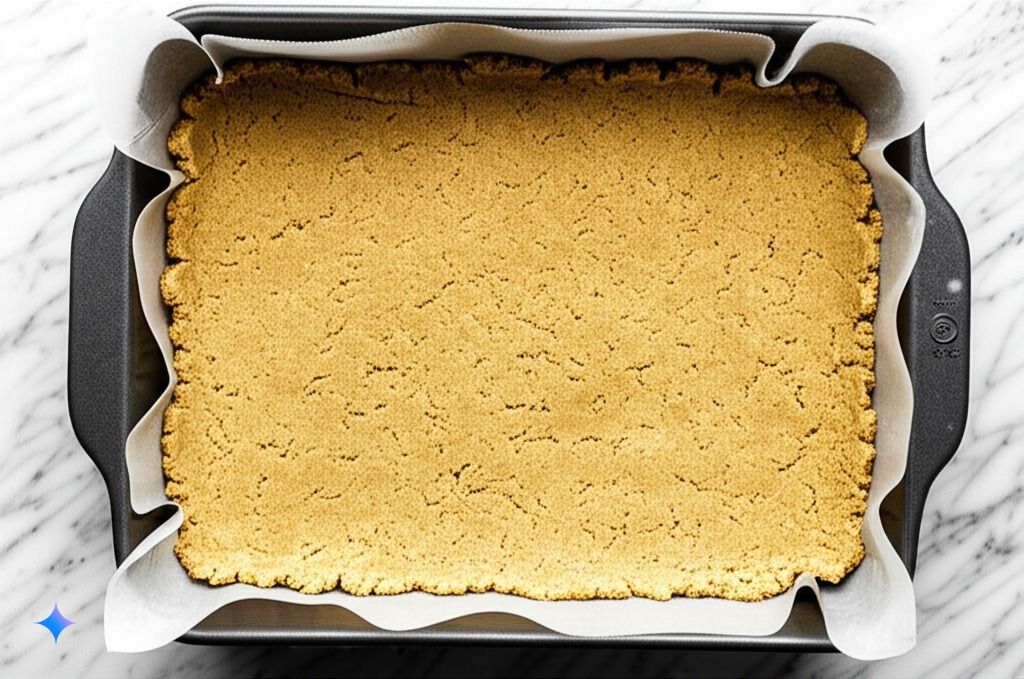
We’ll start by getting our baking vessel ready. A 9×13 inch baking pan is ideal for this recipe. Lightly grease the bottom and sides of the pan with butter or cooking spray. Then, line the bottom with parchment paper, leaving an overhang on the sides. This “sling” will make it super easy to lift the baked bars out of the pan later.
Step 2: Make the Crust and Crumble (One Dough, Two Ways!)
Here’s a little secret that makes these bars so easy: we use the same dough for both the crust and the crumble topping! Talk about efficiency!
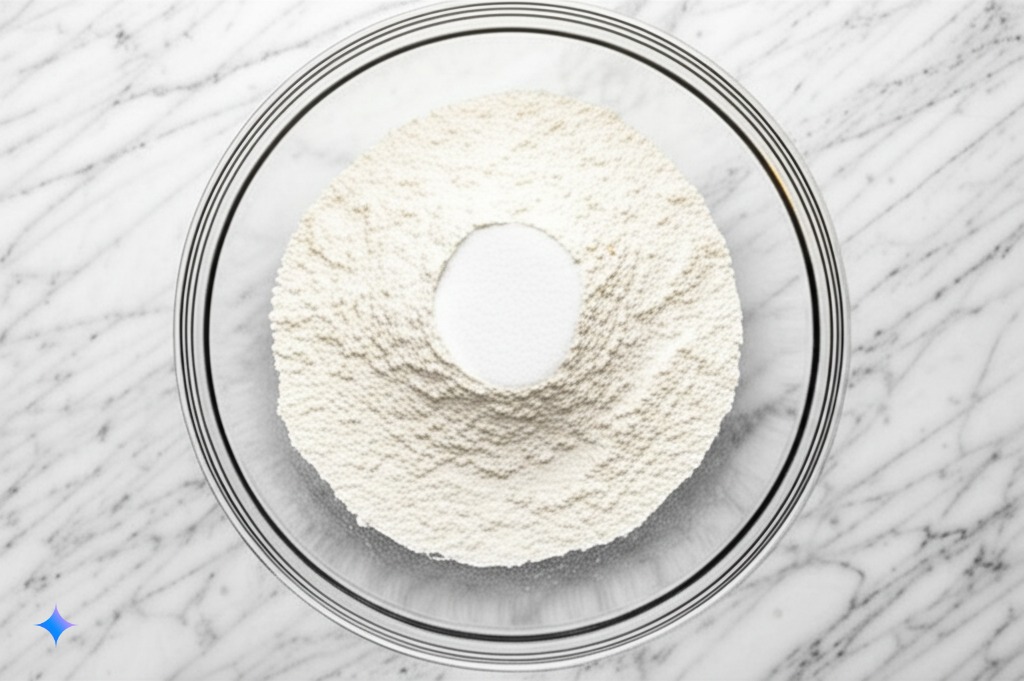
In a large bowl, whisk together the flour, granulated sugar, and salt.
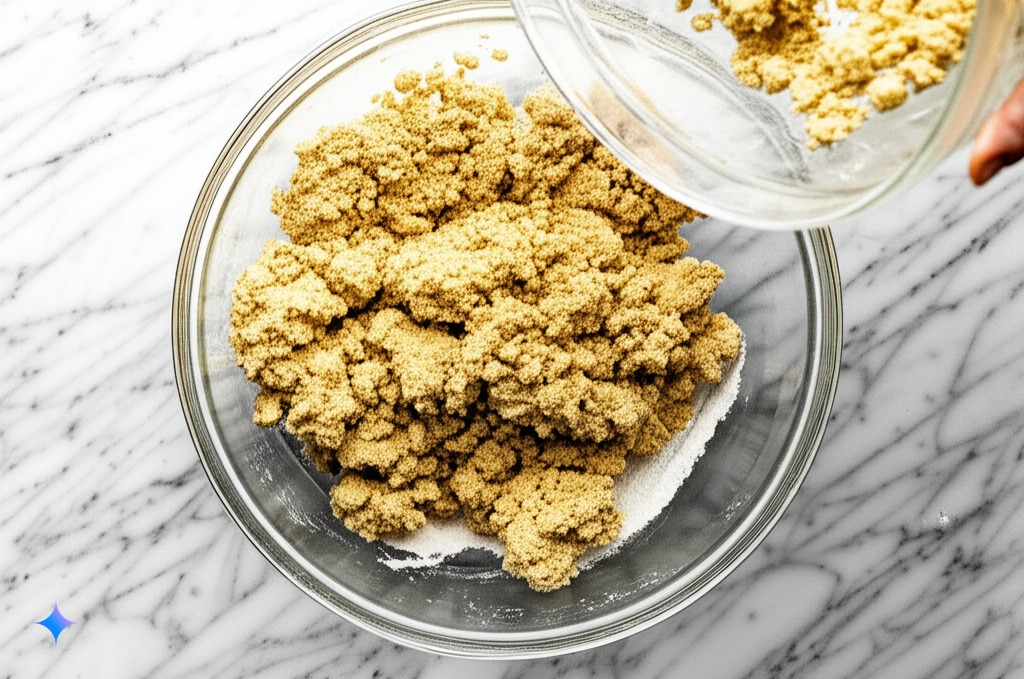
Add the cold, cubed butter to the dry ingredients. Using a pastry blender, your fingertips, or a fork, cut the butter into the flour mixture until it resembles coarse crumbs with some pea-sized pieces of butter remaining. This is crucial for creating a flaky texture!
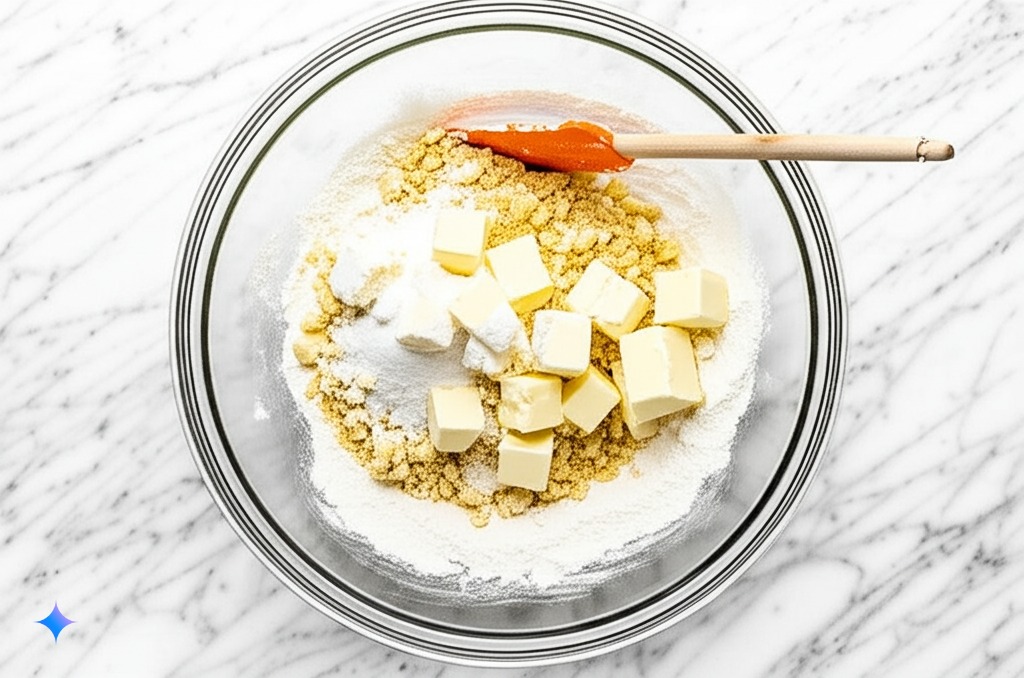
In a small bowl, whisk together the egg and ice water.
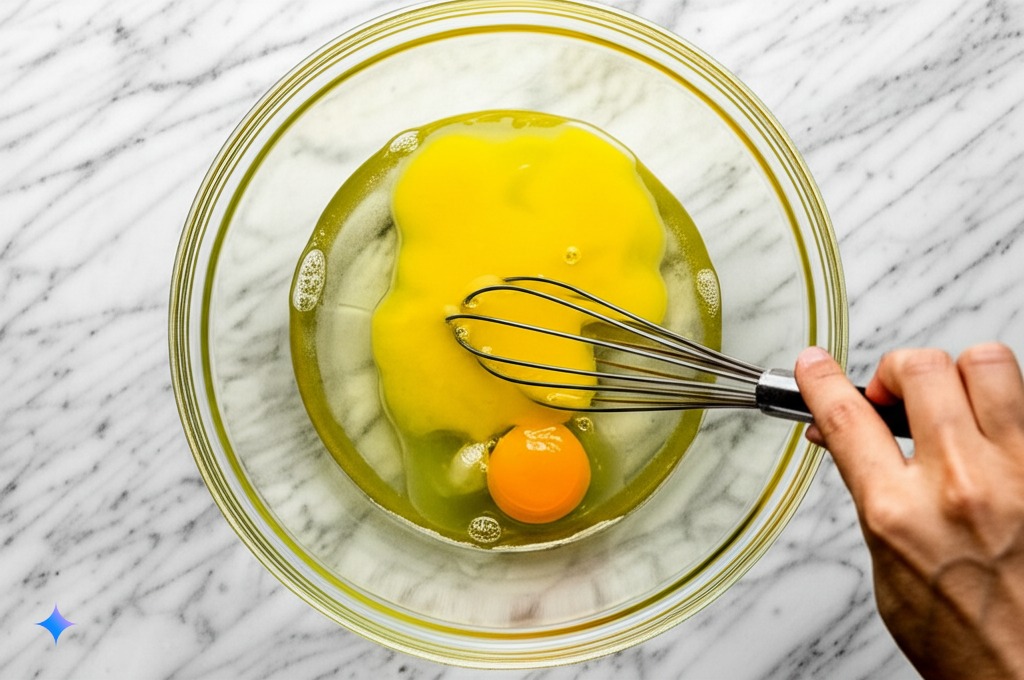
Pour the egg mixture into the flour-butter mixture and stir until just combined. Be careful not to overmix! The dough will still look a little shaggy, and that’s okay.
Step 3: Press the Crust into the Pan
Divide the dough in half. Take one half and press it evenly into the prepared baking pan. Use your fingertips or the back of a spoon to create a firm and even layer. Don’t worry if it’s not perfectly smooth; we’re going for rustic charm here!
Step 4: Prepare the Glorious Cherry Filling
Now for the star of the show! In a large bowl, gently toss the thawed and well-drained cherries with the granulated sugar, cornstarch, lemon juice, vanilla extract, and almond extract (if using). Make sure the cherries are evenly coated with the sugar and cornstarch. The cornstarch will work its magic in the oven, thickening the cherry juices into a luscious, gooey filling.
Step 5: Assemble the Cherry Pie Bars
Pour the prepared cherry filling evenly over the pressed crust in the baking pan.

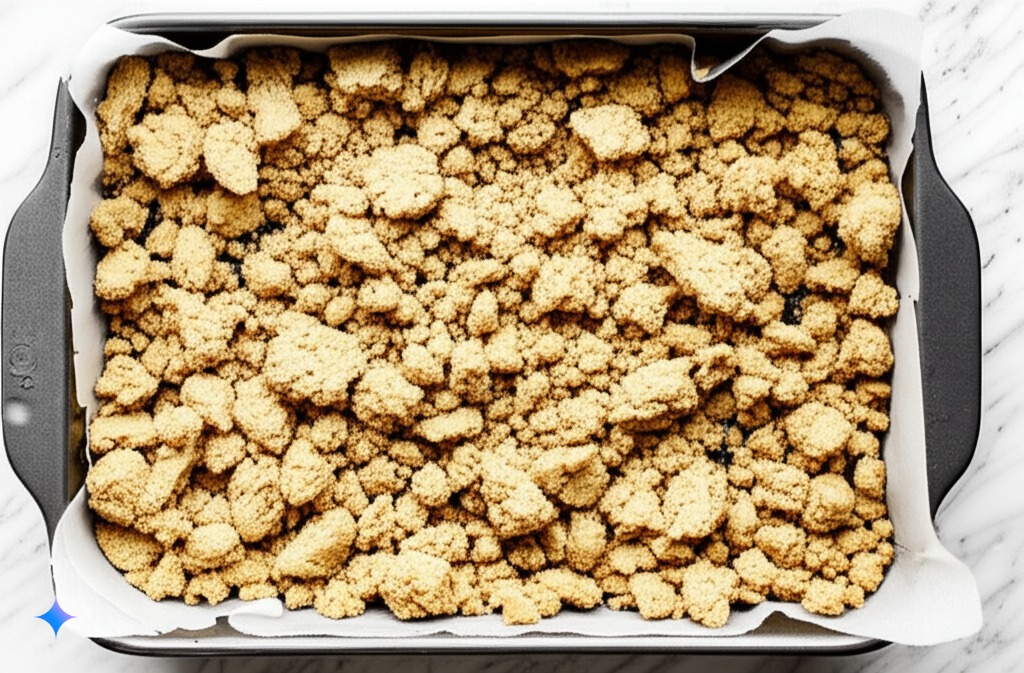
Now, take the remaining half of the dough and crumble it evenly over the cherry filling. You can create small, medium, and even some larger clumps for a more rustic look. If you like a more uniform crumble, you can use a fork to break up any larger pieces. For an extra touch of sparkle and crunch, sprinkle the top with coarse sugar or sanding sugar.
Step 6: Bake Until Golden and Bubbly
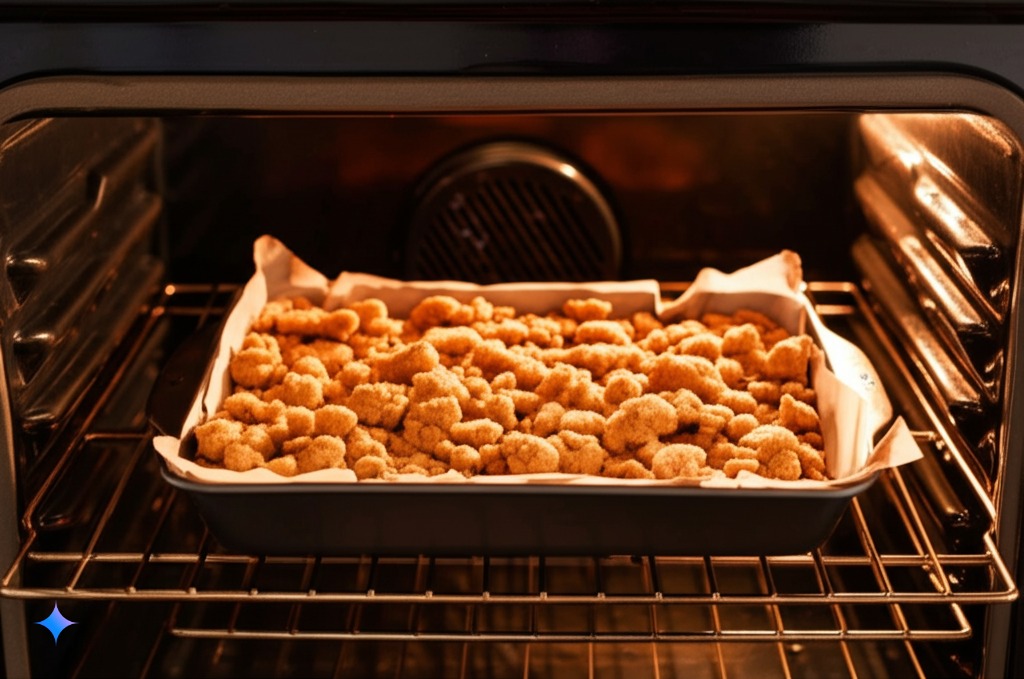
Place the baking pan in a preheated oven at 375°F (190°C) and bake for 45-55 minutes, or until the crust and crumble topping are golden brown and the cherry filling is bubbling around the edges. The exact baking time may vary depending on your oven. If the topping starts to brown too quickly, you can loosely tent the pan with aluminum foil.
Step 7: Cool Completely (The Hardest Part!)
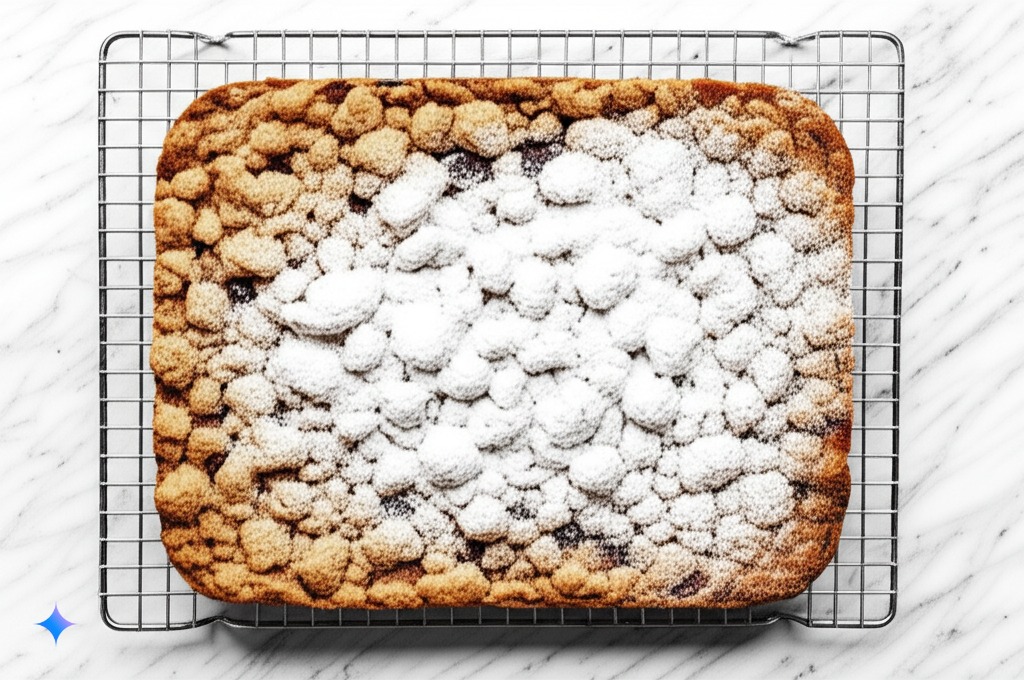
Once baked, remove the cherry pie bars from the oven and place the pan on a wire rack to cool completely. This is the most crucial step! The filling needs time to set properly. If you try to slice them while they’re still warm, the filling will be runny and messy. Trust me, the wait is worth it! Aim for at least 2-3 hours of cooling time, or even better, let them cool completely at room temperature and then chill in the refrigerator for an hour before slicing.
Step 8: Slice and Enjoy Your Masterpiece!
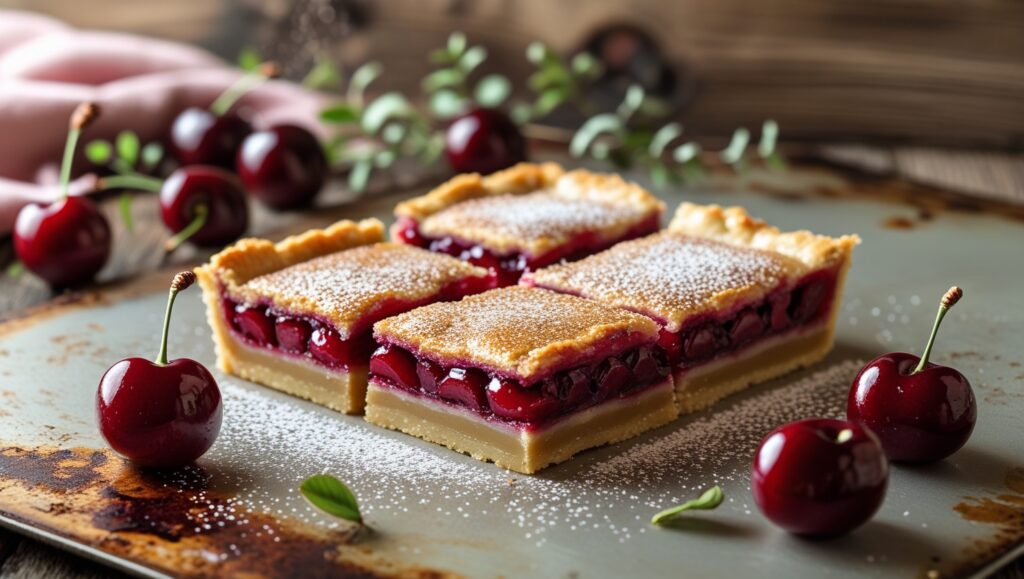
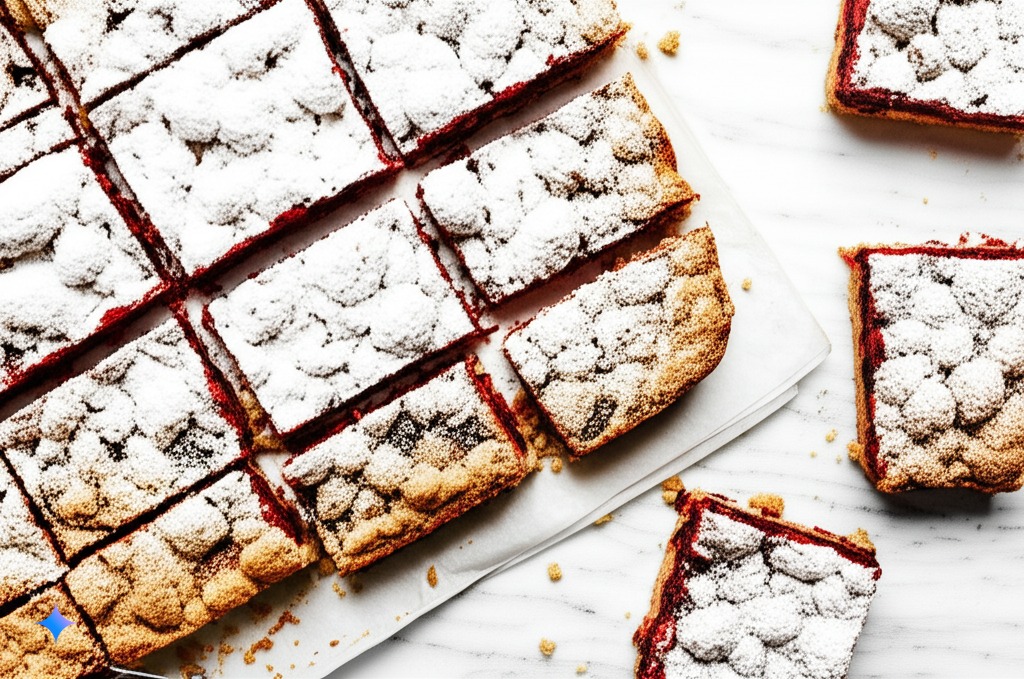
Once the bars are completely cool, use the parchment paper overhang to lift them out of the pan. Place them on a cutting board and slice them into squares or rectangles of your desired size. Dust with powdered sugar, if desired, for a pretty finish. Now, the moment you’ve been waiting for… grab a bar and enjoy the burst of sweet-tart cherry flavor and the delightful buttery crumble!
Tips and Tricks for Cherry Pie Bars Recipe Success:
Want to take your cherry pie bars to the next level? Here are a few extra tips and tricks:
- Keep the Butter Cold: This is non-negotiable for a flaky crust and crumbly topping. If your kitchen is warm, you can even chill the flour mixture before adding the butter.
- Don’t Overmix the Dough: Overmixing develops the gluten in the flour, which can result in a tough crust. Mix just until the ingredients are combined.
- Drain Your Cherries Well: Excess liquid from the cherries will lead to a soggy bottom crust. Take the time to drain them thoroughly.
- Adjust Sweetness to Your Liking: Taste your cherries before making the filling. If they are particularly sweet, you may want to reduce the amount of sugar in the filling. If they are tart, you might want to add a little more.
- Experiment with Extracts: Almond extract is a classic pairing with cherry, but you could also try a touch of vanilla bean paste or even a hint of rum extract for a different flavor twist.
- Get Creative with the Topping: Instead of a simple crumble, you could try adding some chopped nuts (like pecans or walnuts) to the topping for extra crunch.
- For a Glossier Filling: Instead of cornstarch, you can use tapioca starch as a thickener. It tends to create a slightly glossier finish.
- Serving Suggestions: These cherry pie bars are delicious on their own, but they are also wonderful served warm with a scoop of vanilla ice cream, a dollop of whipped cream, or a drizzle of glaze.
Frequently Asked Questions (FAQ):
- Can I use fresh cherries? Yes, absolutely! You’ll need about 6 cups of pitted fresh cherries.
- Can I use a different kind of fruit? Of course! This recipe works well with other fruits like blueberries, raspberries, peaches, or apples. You may need to adjust the amount of sugar and thickener depending on the juiciness of the fruit.
- How do I store cherry pie bars? Once completely cooled, store them in an airtight container at room temperature for up to 3 days or in the refrigerator for up to a week.
- Can I freeze cherry pie bars? Yes! Once completely cooled, cut them into individual bars and wrap them tightly in plastic wrap, then place them in a freezer-safe bag or container. They can be frozen for up to 3 months. Thaw them overnight in the refrigerator before serving.
- My crust is tough, what did I do wrong? The most likely culprit is overmixing the dough. Be gentle when combining the ingredients. Also, make sure your butter is cold.
Conclusion: Time to Bake Some Happiness!
There you have it! Your complete guide to creating utterly delicious and surprisingly easy cherry pie bars. Forget the fuss of traditional pies and embrace the simplicity and joy of these delightful squares. Whether you’re a seasoned baker or just starting out, this recipe is sure to become a new favorite.
So, preheat your oven, gather your ingredients, and get ready to fill your kitchen with the irresistible aroma of warm cherries and buttery crust. Happy baking! And don’t forget to share your delicious creations (if they last that long!).