The Easiest Birthday Cake Recipe Ever (And It Works Every Time!)
Birthdays are special. They deserve a special cake. We’ve made a few over the years, and making one yourself brings so much love with it. This recipe produces a classic vanilla cake. It’s moist, fluffy and it tastes amazing. And we’ll prepare an easy, creamy buttercream frosting. It’s an ideal starting point for sprinkles and candles.
Why Bake from Scratch?
It tastes fresher. You control the ingredients. The scent envelops your home in happiness. Honestly, it’s just more fun!
This is an easy enough recipe. No confusing steps here. Just simple baking goodness. Let’s gather what we need.
Reasons To Love This Birthday Cake Recipe
- Super Moist: The texture remains soft and tender for days.
- Super Fluffy: This soften has a perfectly fluffy texture. Not dense at all.
- Classic Vanilla Flavor: A popular flavor everyone loves.
- Easy To Make: Simple steps for the beginner.
- Consistent Results: Step by step yields success every time.
- Awesome Buttercream: Fluffy, creamy, and not overly sweet.
Are you ready to impress yourself and others? Let’s bake!
Ingredients You’ll Need
Prep everything before you dive in. Being organized makes baking easier.
For the Vanilla Cake:
- 2 ½ cups all-purpose flour
- 2 ½ teaspoons baking powder
- ½ teaspoon salt
- 1 ½ cups granulated sugar
- ½ cup unsalted butter, at room temperature (this is crucial!)
- ½ cup vegetable oil (or balanced outras neutral oils)
- 3 large eggs, at room temperature (so crucial!)
- 1 tablespoon vanilla extract
- 1 cup milk (whole or 2%), at room temperature
For the Simple Vanilla Buttercream Frosting:
- 1 cup (2 sticks) unsalted butter, at room temperature
- 3–4 cups powdered sugar, sifted
- ¼ cup milk or heavy cream
- 1 ½ teaspoons pure vanilla extract
- Pinch of salt
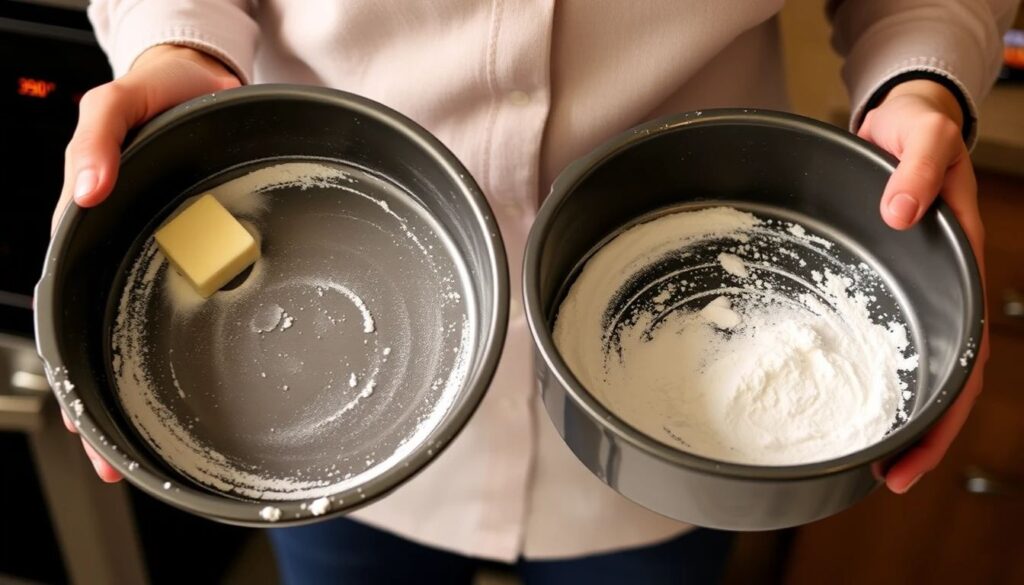
Equipment You’ll Use
No fancy gadgets required. Just basic kitchen tools.
- 8-inch or 9-inch, two round cake pans
- Large mixing bowl
- Medium mixing bowl
- Whisk
- Electric mixer (handheld or stand mixer)
- Rubber spatula
- Measuring cups and spoons
- Wire cooling rack
- Eager parchment paper (optional, but useful)
- Offset spatula or butter knife for spreading frosting
BAKING THE CAKE: A STEP-BY-STEP GUIDE
Step 1: Preheat the Oven and Prepare the Pans
Set it to 350°F (175°C). Grease pans with butter or cooking spray. Line bottoms with parchment paper if desired. Lightly flour, then tap out excess.
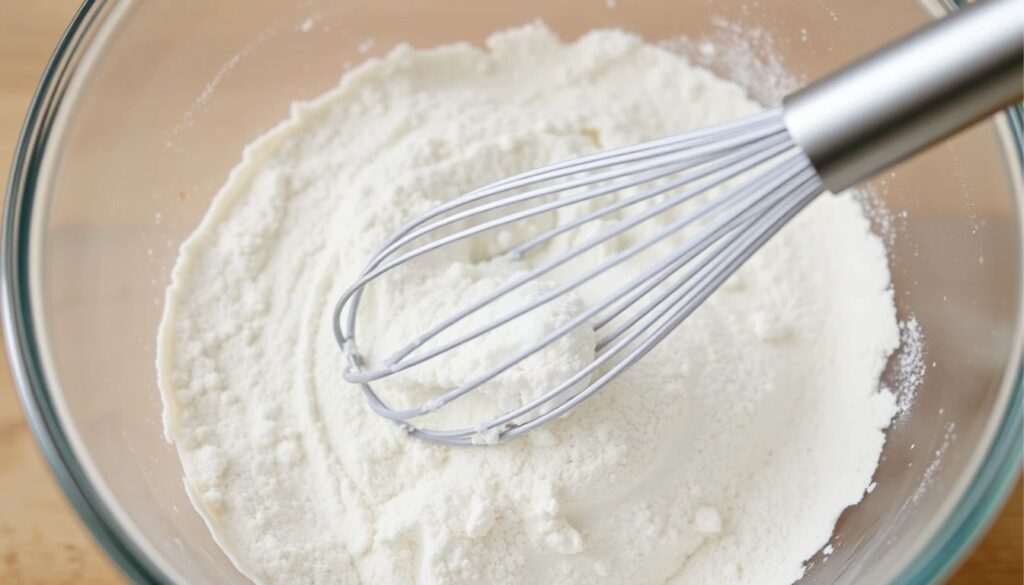
Step 2: Mix Dry Ingredients
In the medium mixing bowl, whisk together flour, baking powder, and salt. Set aside.
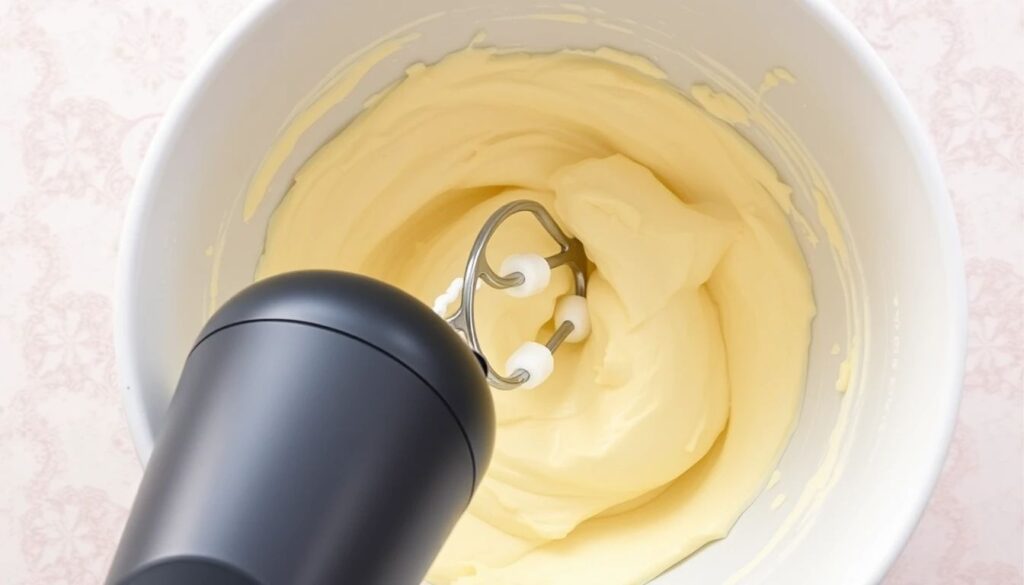
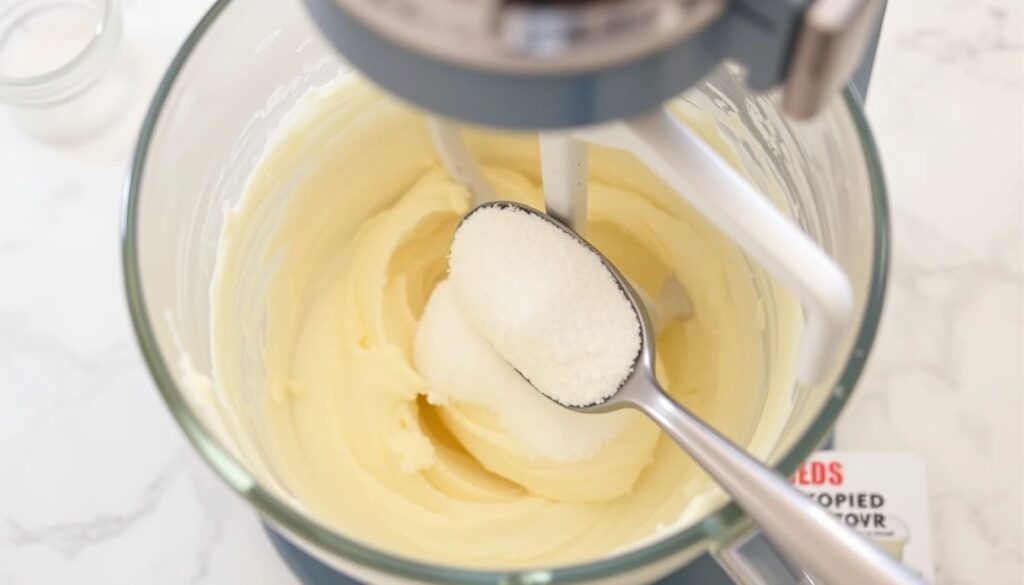
Step 3: Cream Together the Butter and Sugar
In the large bowl, beat softened butter with mixer for 1 minute until creamy. Add granulated sugar. Beat 3–4 minutes until light and fluffy.
(Chief Editor: Akshay Kumar)
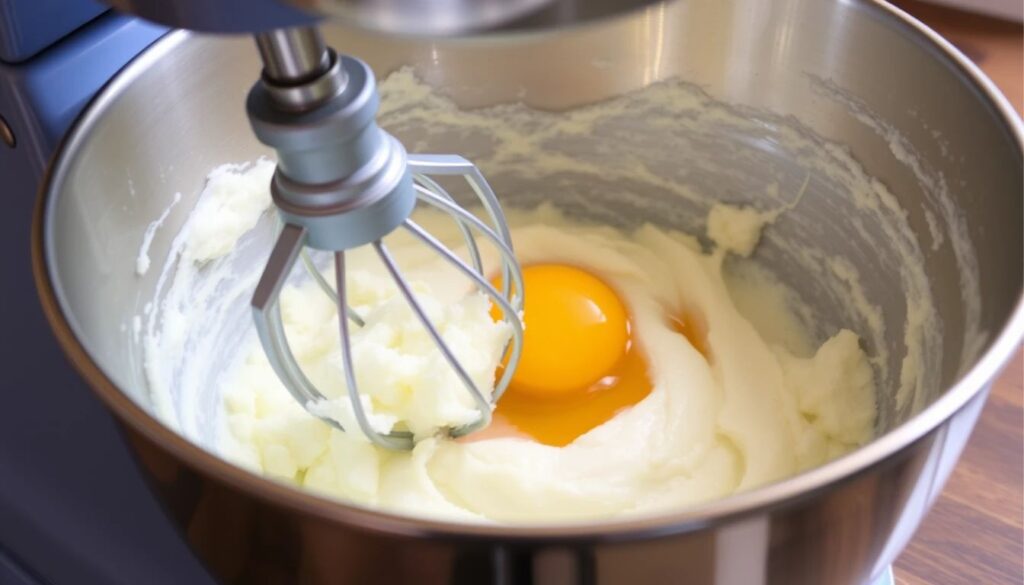
Step 4: Add Oil, Eggs and Vanilla
Mix in vegetable oil on low speed. Add eggs one at a time, mixing well after each. Scrape bowl as needed. Add vanilla. Mix until smooth.
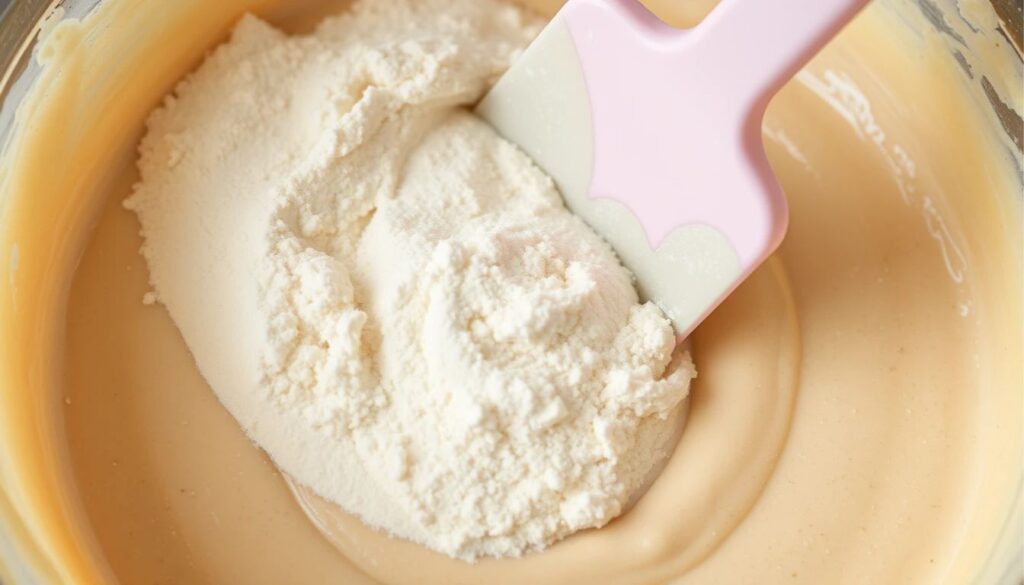
Step 5: Alternate Dry and Wet Ingredients
Alternate additions of flour mixture and milk, beginning and ending with dry ingredients. Mix each addition just until combined. Avoid overmixing.
(Note: Adam Liptak is a Supreme Court correspondent for The New York Times.)
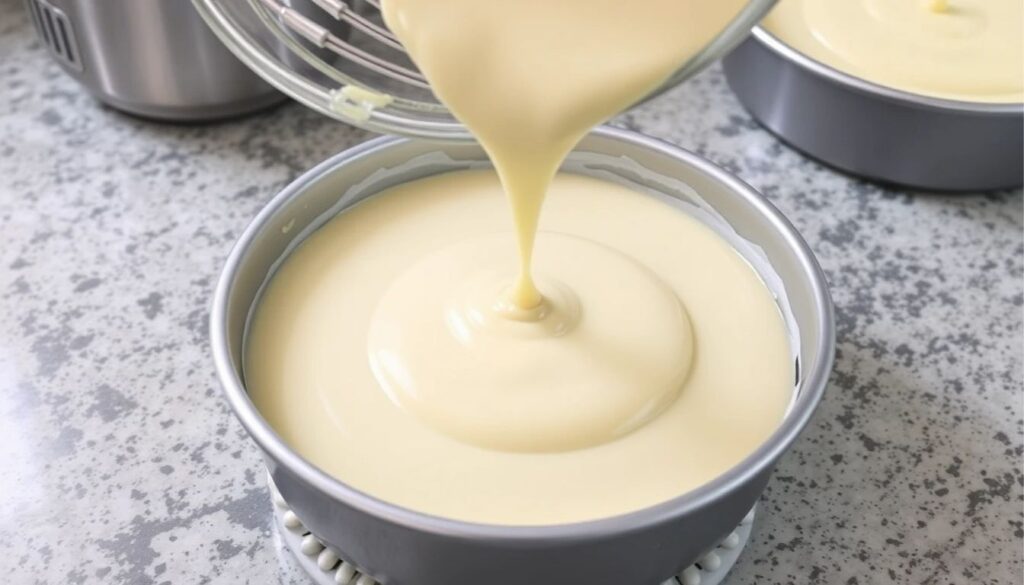
Step 6: Pour Batter into Pans
Divide batter evenly into pans. Spread tops flat with spatula.
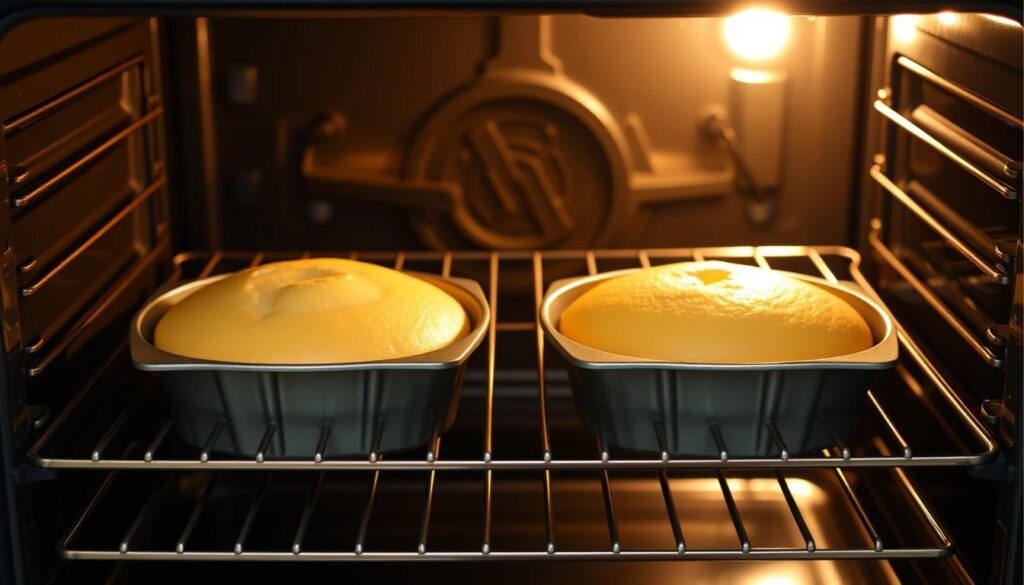
Step 7: Bake the Cakes
Bake 30–35 minutes. Cakes are done when golden brown and a toothpick comes out clean. Press top gently—should spring back.
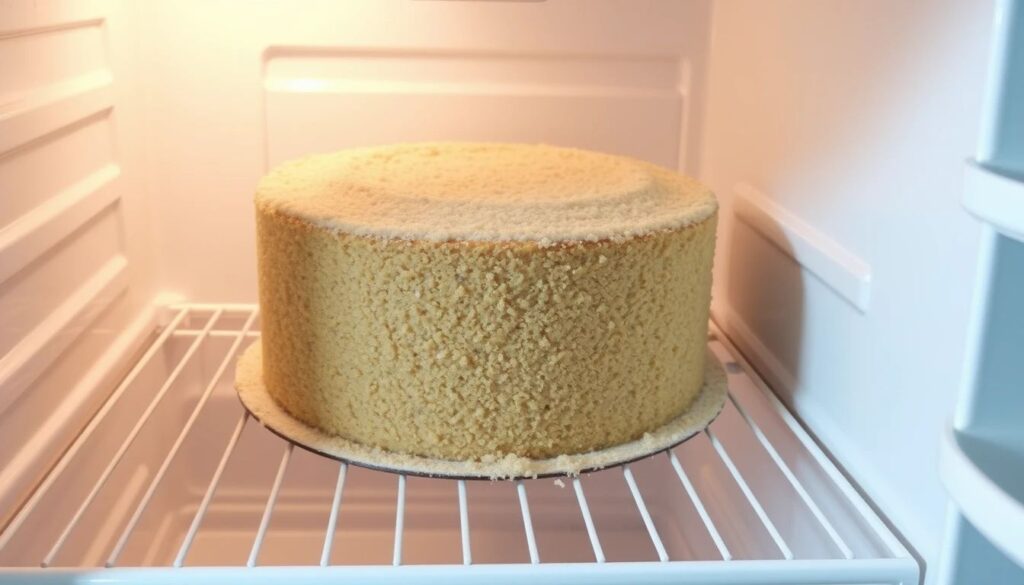
Step 8: Cool the Cakes
Cool in pans on wire rack for 15 minutes. Remove from pans and cool completely for 1–2 hours. Never frost warm cakes!

Making the Buttercream Frosting: Step by Step
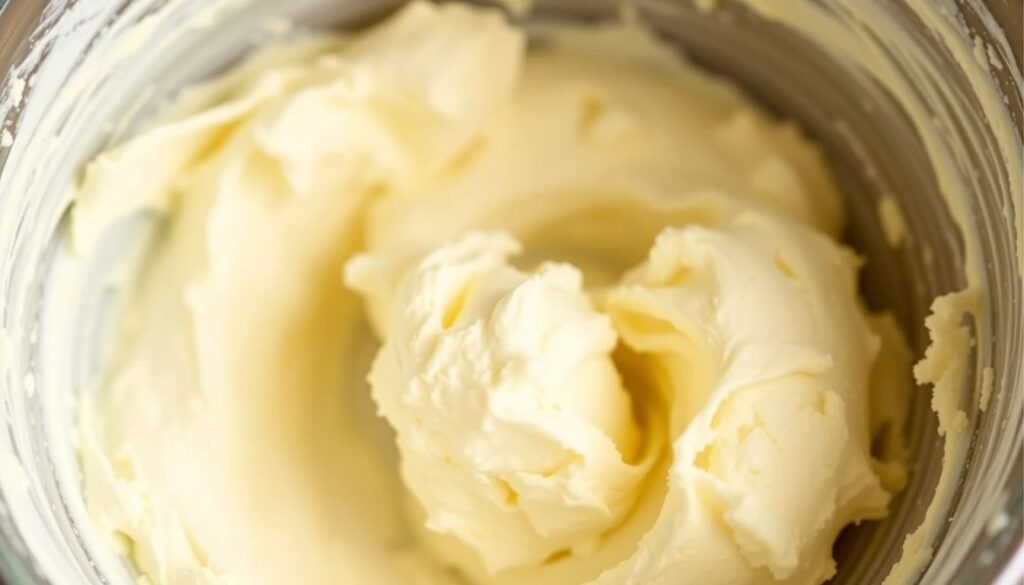
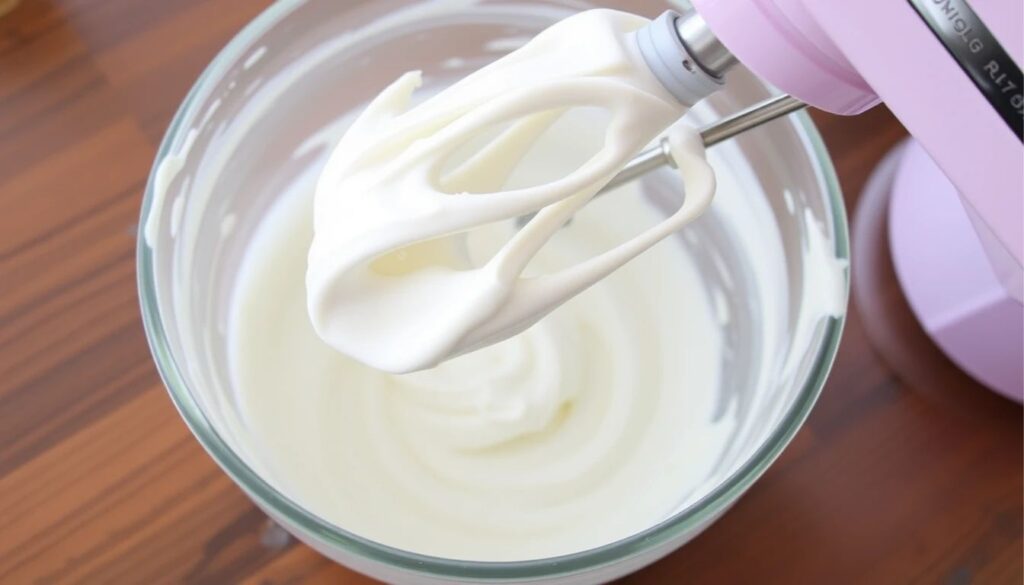
Step 1: Beat the Butter
Beat softened butter on medium-high speed for 5 minutes until pale and fluffy.
Step 2: Slowly Incorporate the Powdered Sugar
Reduce mixer to low. Add sifted powdered sugar gradually, 1 cup at a time. Mix until fully incorporated. Add a pinch of salt.
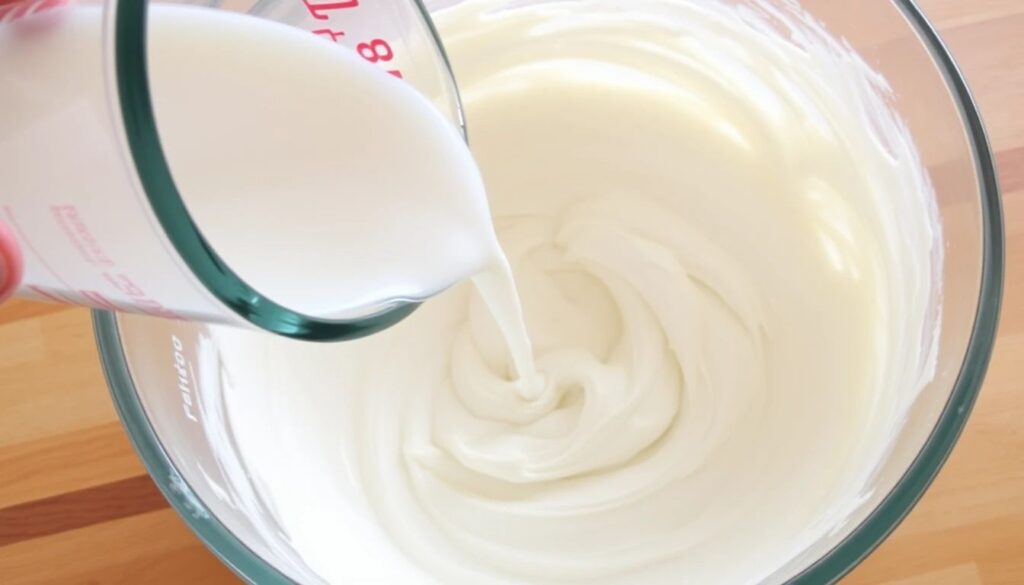
Step 3: Add Vanilla and Milk/Cream
Pour in vanilla extract. Add 3 tablespoons milk or cream. Mix on low, then medium-high speed for 3–5 minutes until smooth and spreadable.
Adjust consistency with more milk or sugar as needed.
Step 4: Final Whip
Whip again on high speed for 30 seconds for maximum fluffiness.
Putting Together Your Birthday Cake Masterpiece
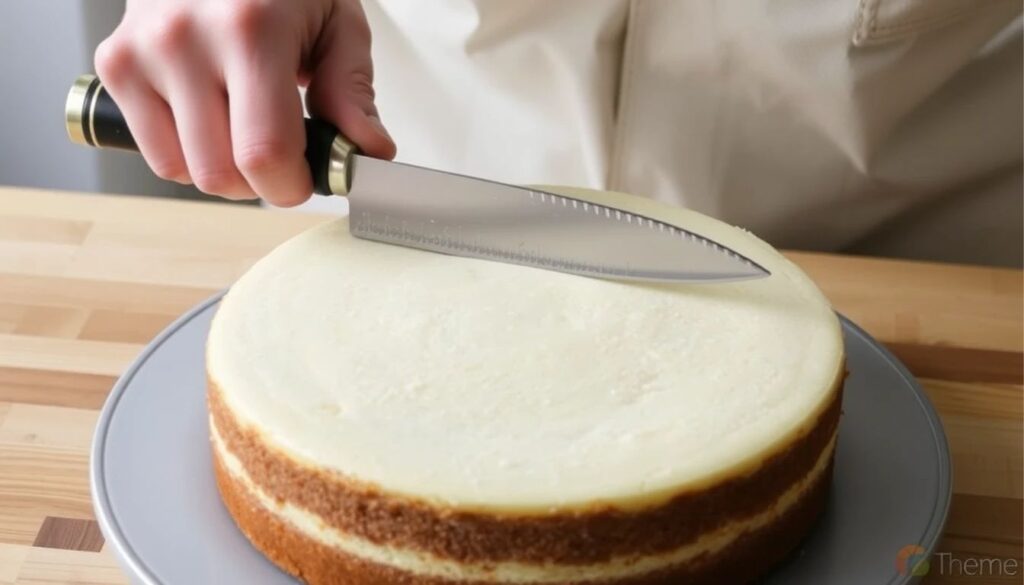
Step 1: Level the Cakes (Optional)
Use a serrated knife to trim domed tops flat. Snack on scraps!
Step 2: Place the First Layer
Add a dab of frosting to your plate or stand. Place first cake layer, cut side up, and press gently.
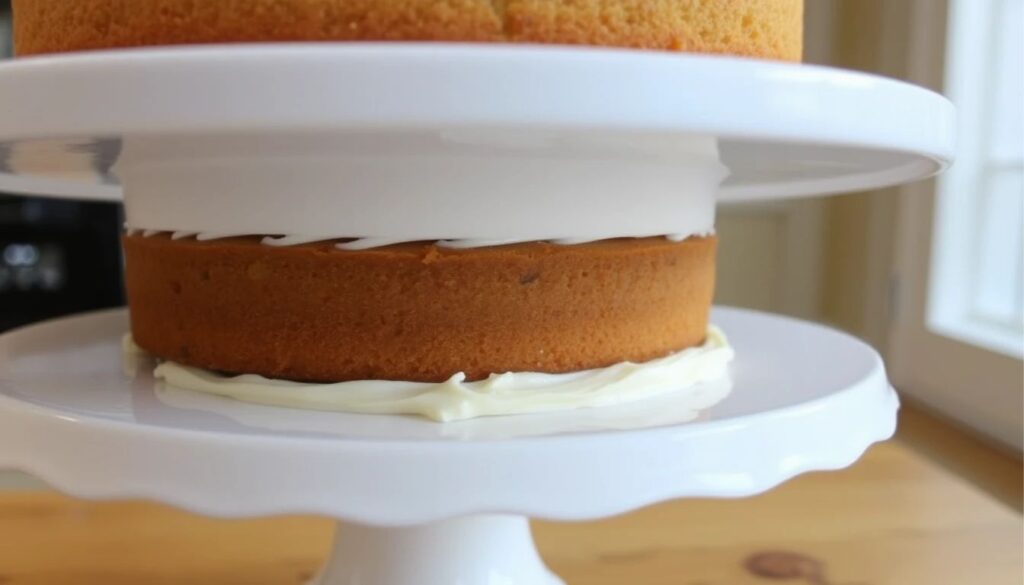
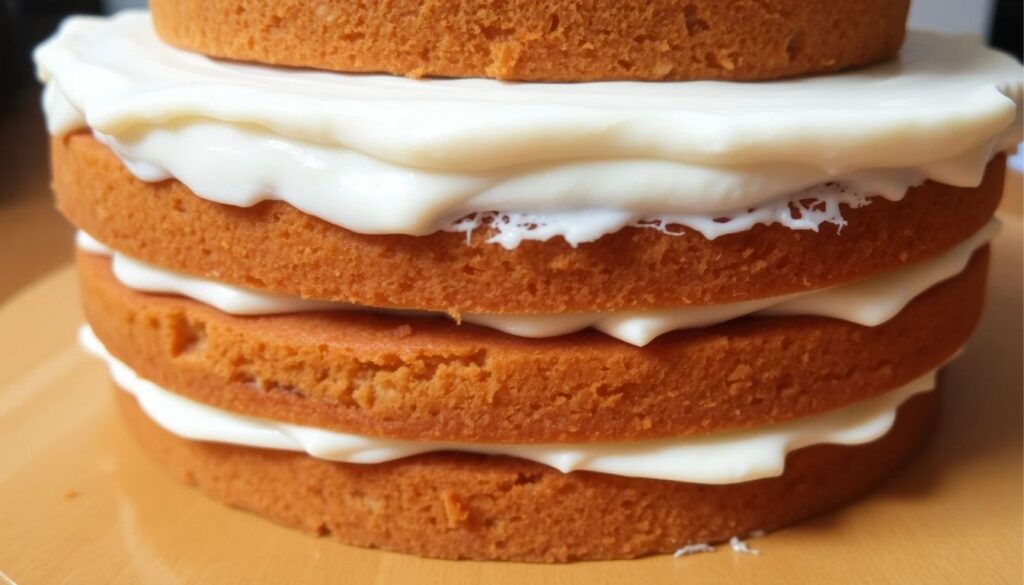
Step 3: Add the Filling
Spread ~1 cup of frosting evenly over the first layer using spatula or knife.
Step 4: Add the Second Layer
Place second layer cut-side down for a flatter top. Align with bottom layer and press gently.
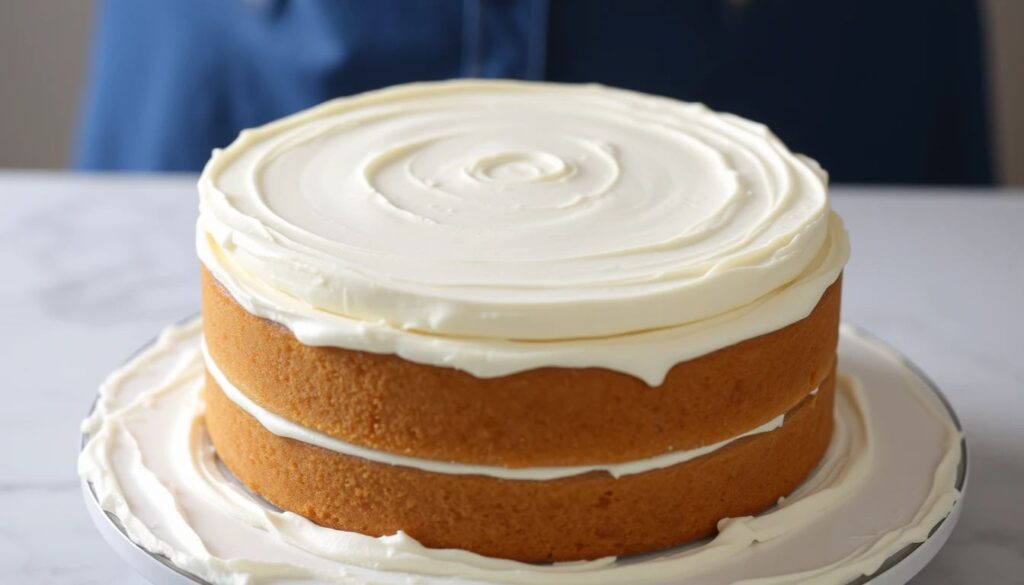
Step 5: Add a Crumb Coat
Apply a thin layer of frosting to trap crumbs. Doesn’t need to be perfect!
Step 6: Chill the Crumb Coat
Place cake in fridge for 20–30 minutes to firm up crumb coat.
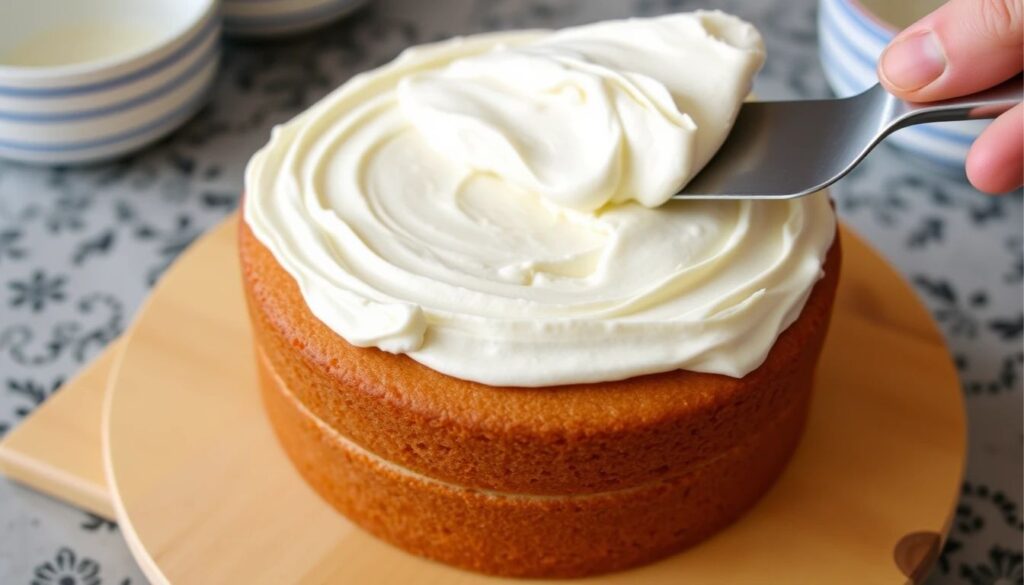
Step 7: Use the Last Layer of Frosting
Remove from fridge. Apply remaining frosting, smoothing or swirling as desired.
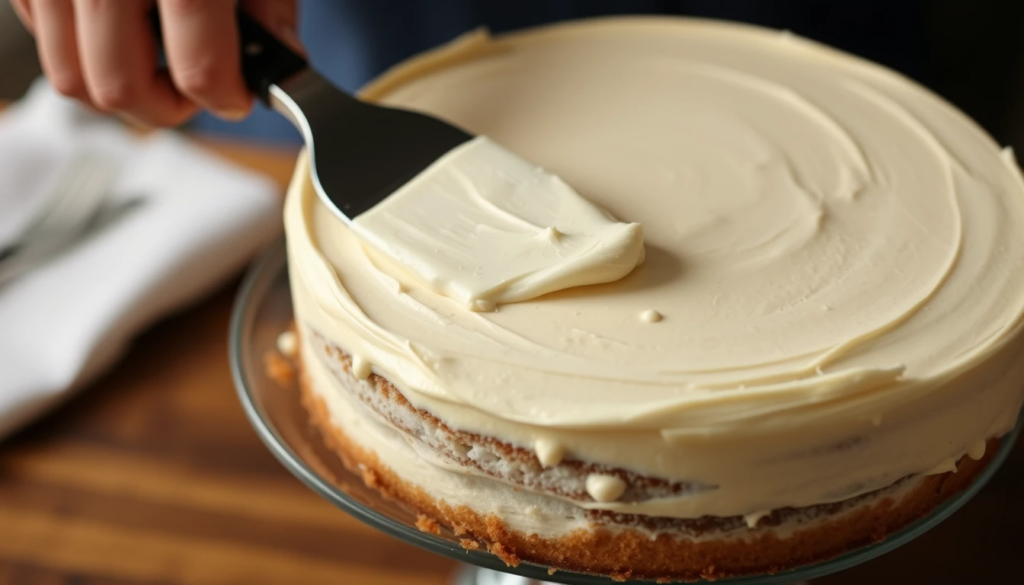
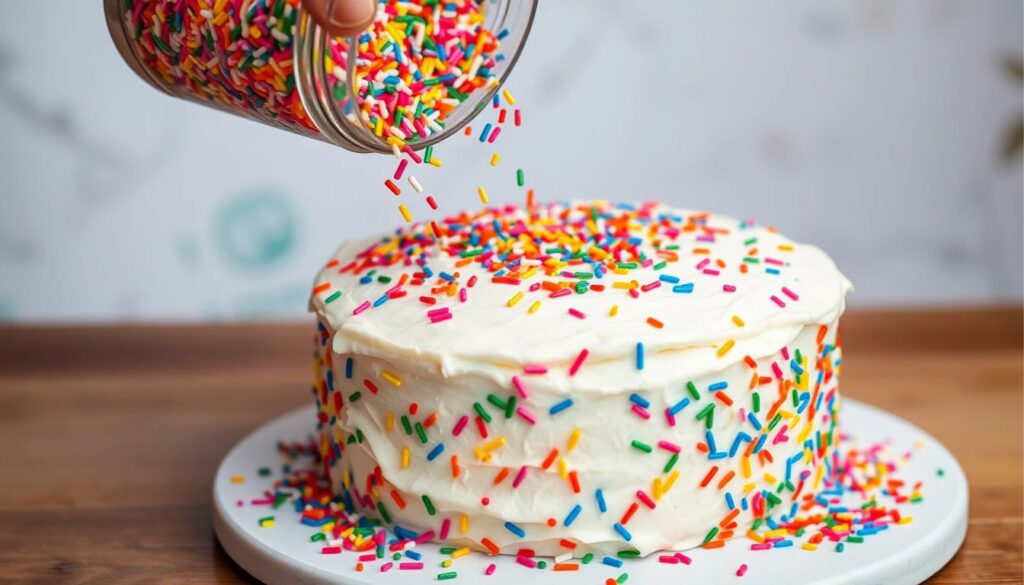
Step 8: Decorate!
Add sprinkles, chocolate chips, berries, nuts, or piping. Don’t forget the candles!
Tips for Birthday Cake Success
Room Temperature Matters
No joke, use room temperature eggs, butter, and milk. They combine more smoothly for a batter that turns into a fluffier cake.
Measure Flour Properly
As you’re filling up your measuring cup, spoon the flour into it. Then finish level with a straight edge. Avoid scooping directly from the bag. Scooping packs in too much flour.
Don’t Overmix
Only mix batter until ingredients are just combined. The point at which it gets sticky, particularly after the addition of flour. Overmixing creates gluten, which makes cake tough.
Do Not Open the Oven Door Too Soon
Allow the cake to bake undisturbed for at least the first 20-25 minutes. The act of opening the door can make it sink.
Cool Cakes Thoroughly
Frost warm cakes = puddle of goo. Patience pays off here.
Sift the Powdered Sugar
If you want the smoothest frosting, sift your powdered sugar. It removes lumps.
Crumb Coat is Your Friend
In the vein of don’t skip the crumb coat. This makes the final presentation way cleaner.
Keeping Your Homemade Birthday Cake Fresh
You might have leftovers. Lucky you!
Counter
If the climate in your home isn’t too steamy, you can leave the frosted cake out. Loosely cover with a cake dome or inverted bowl. Once cool, it can be kept fresh for 2-3 days.
Refrigerator
Store in the fridge for more extended storage. Make sure to cover it well so it doesn’t dry out. It can last up to 5 days. Allow to stand at room temperature for 30 minutes before serving. Cold cake isn’t as flavorful.
Freezing
Cake layers that has no frosting can also be stored in the freezer. Saran wrap them and then the foil. They freeze well for at least 2 months. Defrost overnight in the refrigerator. You can freeze the frosted cake as well, but the embellishments may not fare well.
Fun Variations to Try
Want to change things up? Try these ideas:
- Chocolate Birthday Cake: Substitute ½ cup of the flour for ½ cup of unsweetened cocoa powder. Combine it with the dry ingredients. Perhaps using chocolate frosting as well!
- Lemon Birthday Cake: Add the zest of 1-2 lemons to the butter/sugar mixture. Substitute some of the milk with fresh lemon juice for more zing. It would be so good with a lemon frosting.
- Funfetti Cake: Fold ½ cup colorful sprinkles gently into the finished batter. Do this just before pouring into pans.
- Variety of Frostings: Make cream cheese frosting, chocolate buttercream or a fruit-flavored frosting.
FAQs
Q1: Can I turn this recipe into cupcakes?
A: Yes! This recipe is also excellent for cupcakes. Grease a muffin tin and line with paper liners. Fill each liner about two-thirds full. Bake for 18-22 minutes at 350°F (175°C). Check with a toothpick. This recipe will yield about 24 cupcakes.
Q2: Can I use a different size pan?
A: Yes. You can use one 9×13 inch rectangular pan. Baking time will be a little longer, 35-45 minutes. Check for doneness. It may take less time for three 6-inch round pans. Keep an eye on them.
Q3: How do I know if my cake is dry?
A: Dry cake typically results from a few things. Flour is measured a little too well (too much flour). Overbaking the cake. Or for occasionally opting for low-fat milk or butter substitutes. Use full-fat ingredients for moisture. Test cake for doneness just before the minimum baking time.
Q4: Can I prepare the cake layers in advance?
A: Absolutely. The day before, bake the cake layers. Let them cool completely. Tightly wrap them in plastic wrap. Let it sit, at room temperature, overnight. Frost the next day.
Q5: Is it OK to freeze the frosted cake?
A: Yes, you can. Place the frosted cake in the freezer until set (1 hour). Then wrap it tightly in plastic wrap and then foil. Freeze for up to 1 month. Defrost overnight in the fridge. Other decorations, such as sprinkles, may bleed color once frozen.
Q6: May I transform this right into a gluten-free model?
A: A good quality gluten-free all-purpose flour blend. Pick one that’s made for 1:1 baking substitution. Results can vary slightly in texture. Check that your baking powder is gluten-free, too.
Q7: Why do my ingredients need to be at room temperature?
A: The more advanced ones trap air better. This makes for a smoother batter. It also helps the cake to rise higher, with a finer, softer crumb. Chilled ingredients don’t combine as easily.
Q8: My frosting is too sweet. How can I fix it?
A: A sprinkling of salt in the frosting helps cut the sweetness. If it’s still too sweet, you can add just a pinch more salt. Alternatively, mix in a teaspoon of lemon juice or white vinegar. This reduces the sweetness without affecting the flavor all that much. So be cautious, add it very little.
Ready to Celebrate?
You did it! You have a great homemade birthday cake recipe now. It is an emotional reward to bake from scratch. It tastes better. It shows you care. This easy, moist vanilla cake is bound to be a winner. Remember the steps. Make sure your ingredients are at room temperature. Don’t overmix. Cool completely. The buttercream is simple and tasty.
Imagine the facial expression of anyone. Then they see this beautiful cake made for them. That’s the beauty of baking from scratch. So preheat that oven. Get your bowls ready. Put on some music. So let’s make some birthday memories, one delightful slice at a time. Happy Baking!