Alright, dessert devotees, gather ’round! Today, we’re not just talking about any old cheesecake. Oh no, we’re embarking on a culinary adventure to create a masterpiece of tangy sweetness, a swirl of creamy indulgence, a symphony of flavor that will have your taste buds singing opera. We’re talking about Raspberry Bliss Cheesecake Recipe, and trust me, this isn’t your grandma’s plain Jane.
This isn’t just a recipe; it’s a journey. A delicious, rewarding journey that ends with you sinking your fork into a slice of heaven. Whether you’re a seasoned baker or just starting to explore the magic of your oven, fear not! This guide is designed to be fun, easy to follow, and packed with all the tips and tricks you need to create a Raspberry Bliss Cheesecake that will have everyone begging for seconds (and the recipe!). So, grab your aprons, preheat your enthusiasm, and let’s get baking!
Before we dive into the nitty-gritty, let’s talk about why this cheesecake is so darn special.
- The Perfect Flavor Balance: The tartness of fresh raspberries cuts through the rich creaminess of the cheesecake, creating a harmonious dance of sweet and tangy that is simply irresistible.
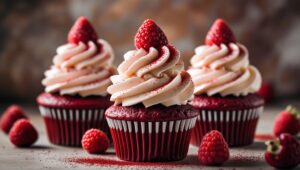
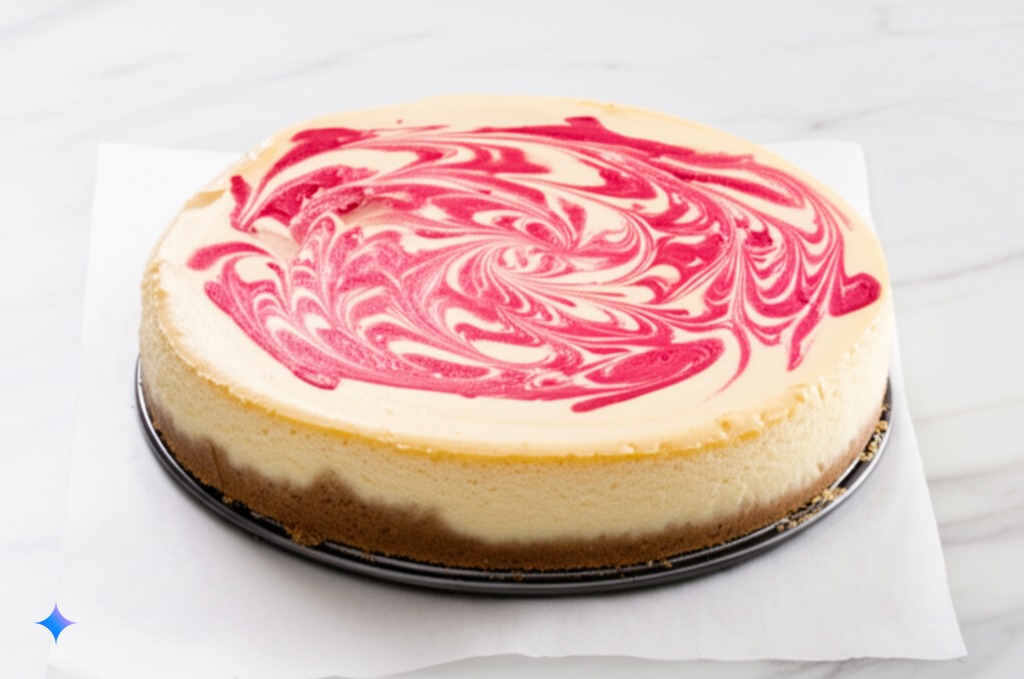
- Visually Stunning: The vibrant pink swirls of raspberry puree against the pale ivory of the cheesecake make for a dessert that’s as beautiful to look at as it is to eat. It’s Instagram-worthy, Pinterest-perfect, and guaranteed to impress.
- Crowd-Pleasing Powerhouse: Seriously, who doesn’t love cheesecake? Add the burst of fresh fruit, and you’ve got a dessert that appeals to a wide range of palates. It’s perfect for parties, holidays, or just a special treat for yourself (you deserve it!).
- Surprisingly Approachable: While it looks and tastes gourmet, this recipe is broken down into easy-to-manage steps, making it achievable for bakers of all skill levels.
Step 1: Gathering Your Ingredients – The Foundation of Flavor
Before you even think about turning on your oven, the first crucial step is to gather all your ingredients. This “mise en place” (fancy French for “everything in its place”) will make the whole process smoother and prevent you from scrambling for that forgotten ingredient mid-bake.
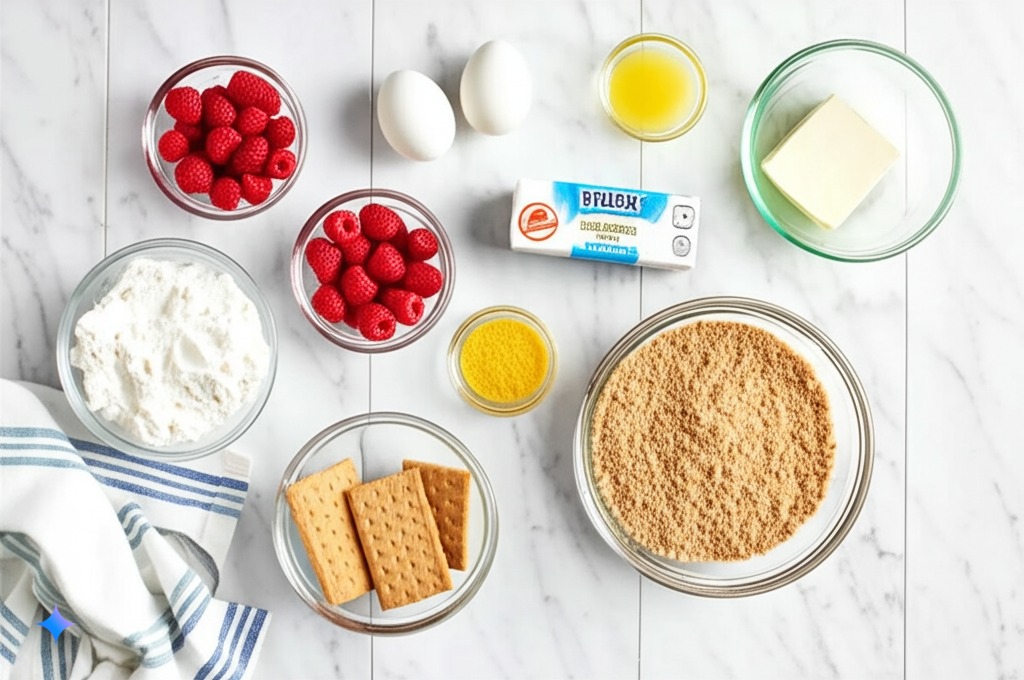
Here’s what you’ll need for our Raspberry Bliss Cheesecake:
For the Crust:
- 1 ½ cups graham cracker crumbs (about 10-12 full graham crackers)
- ¼ cup granulated sugar
- 6 tablespoons unsalted butter, melted
For the Cheesecake Filling:
- 3 (8-ounce) packages cream cheese, softened to room temperature (this is KEY!)
- 1 ½ cups granulated sugar
- 1 teaspoon vanilla extract
- ½ teaspoon lemon zest (optional, but adds a lovely brightness)
- 4 large eggs, at room temperature
For the Raspberry Swirl:
- 1 ½ cups fresh raspberries (or frozen, thawed and drained)
- 2 tablespoons granulated sugar
- 1 tablespoon lemon juice
Optional Garnish:
- Fresh raspberries
- Whipped cream
- A sprinkle of graham cracker crumbs
Pro Tip For Raspberry Bliss Cheesecake Recipe: Room temperature ingredients are crucial for a smooth and lump-free cheesecake filling. Take your cream cheese and eggs out of the fridge at least an hour before you plan to start baking.
Step 2: Crushing the Competition – Making the Graham Cracker Crust
The crust is the unsung hero of the cheesecake. It provides a delightful textural contrast to the creamy filling and a subtle nutty flavor that complements the overall dessert.
Instructions:
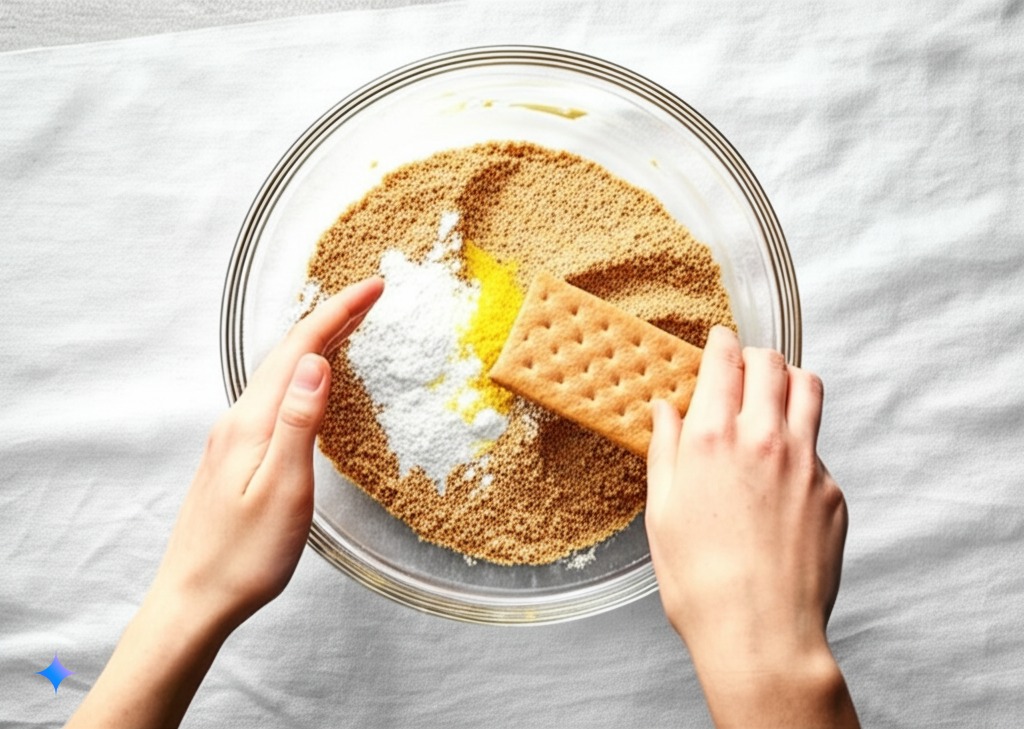
- Crush the Graham Crackers: If you don’t have pre-made graham cracker crumbs, simply place the graham crackers in a zip-top bag and use a rolling pin to crush them into fine crumbs. You can also use a food processor for this step – it’s much quicker!
- Combine Crust Ingredients: In a medium bowl, combine the graham cracker crumbs and granulated sugar.
- Melt the Butter: Melt the unsalted butter in a microwave-safe bowl or in a saucepan over low heat.
- Mix it All Up: Pour the melted butter into the graham cracker crumb mixture and stir until the crumbs are evenly moistened and resemble wet sand.
Baking Tip For Raspberry Bliss Cheesecake Recipe: For a more intense flavor, you can toast the graham cracker crumbs in a dry skillet over medium heat for a few minutes, stirring constantly, until lightly golden and fragrant. Let them cool completely before proceeding.
Step 3: Pressing the Crust – Creating a Solid Foundation
Now that you have your crumb mixture, it’s time to press it into your springform pan. A well-pressed crust is essential for preventing leaks and ensuring a sturdy base for your cheesecake.
Instructions:
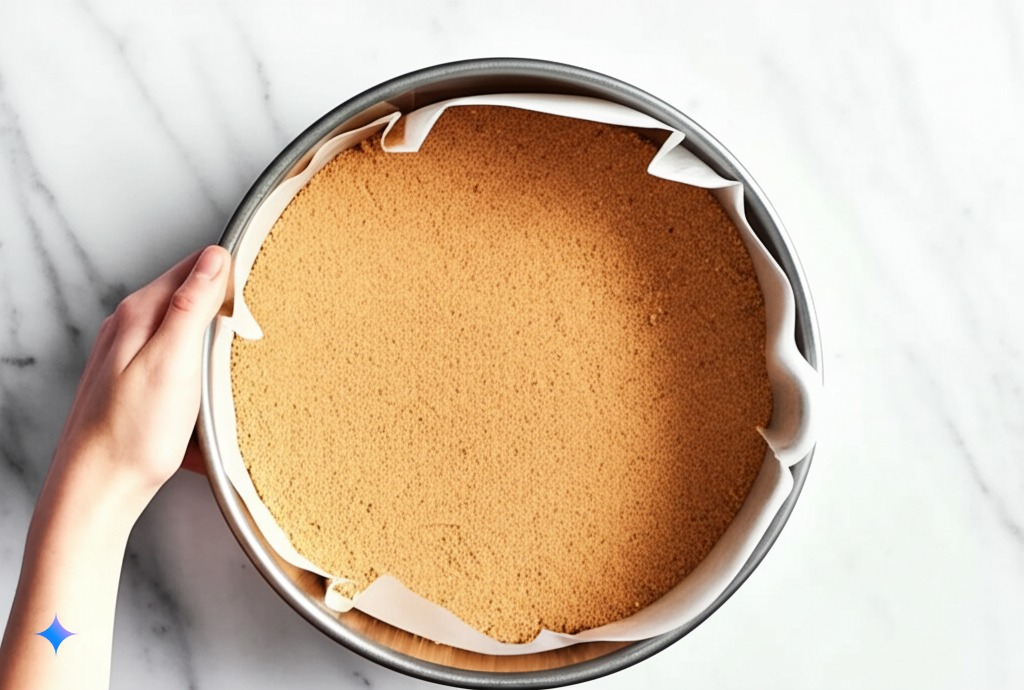
- Prepare Your Pan: Lightly grease the bottom and sides of a 9-inch springform pan with cooking spray or butter. This will make it easier to release the cheesecake later.
- Press the Crumbs: Pour the graham cracker crumb mixture into the prepared springform pan. Use the bottom of a flat-bottomed glass or measuring cup to firmly and evenly press the crumbs into the bottom of the pan. You can also press some of the crumbs slightly up the sides of the pan if you prefer a higher crust edge.
- Chill the Crust: Place the springform pan in the refrigerator and let the crust chill for at least 30 minutes. This allows the butter to solidify and helps the crust hold its shape during baking.
Troubleshooting Tip For Raspberry Bliss Cheesecake Recipe: If your crust seems too dry and isn’t holding together, you might need to add a little more melted butter, a teaspoon at a time, until it reaches the desired consistency.
Step 4: Creaming the Dream – Making the Cheesecake Filling
Now for the star of the show – the creamy, dreamy cheesecake filling! This is where the magic truly begins.
Instructions:
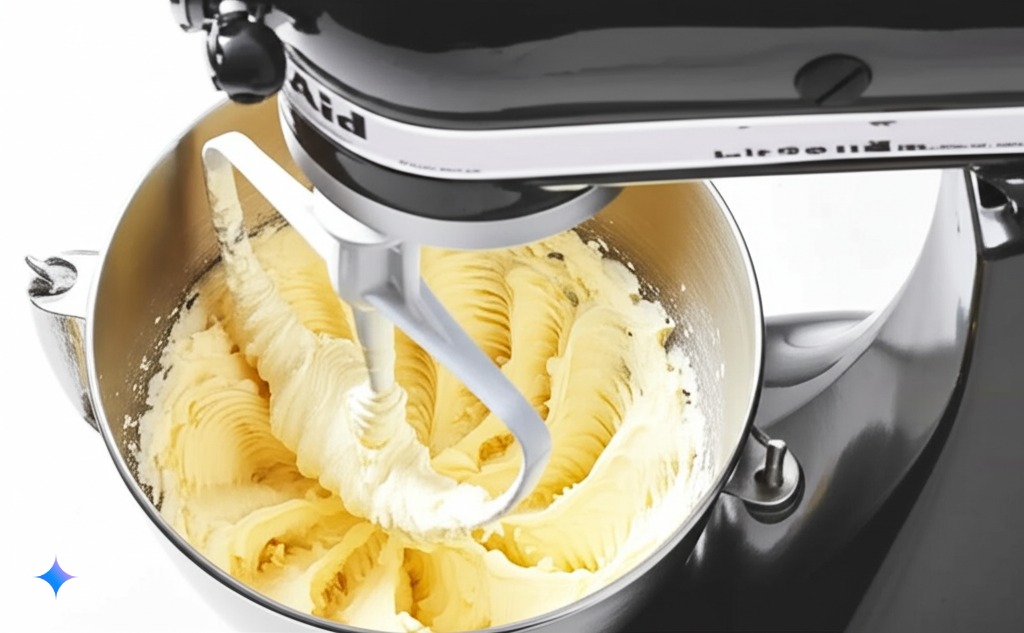
- Beat the Cream Cheese: In a large mixing bowl (or the bowl of a stand mixer fitted with the paddle attachment), beat the softened cream cheese on medium speed until it is completely smooth and lump-free. This is a crucial step, so don’t rush it! Scrape down the sides of the bowl as needed.
- Add the Sugar: Gradually add the granulated sugar to the cream cheese, beating on low speed until just combined. Be careful not to overmix at this stage, as it can incorporate too much air into the batter, which can lead to cracks during baking.
- Incorporate Flavor: Beat in the vanilla extract and lemon zest (if using) until well combined.
- Add the Eggs: Beat in the eggs one at a time, mixing just until each egg is incorporated. Again, be careful not to overmix. Overmixing after adding the eggs is a common cause of cracked cheesecakes.
Secret to Success: Ensure your cream cheese and eggs are truly at room temperature. This will allow them to blend together smoothly and evenly, resulting in a silky, lump-free filling.
Step 5: Swirling with Sweetness – Making the Raspberry Puree
Now for the star of the flavor show – the vibrant raspberry swirl! This not only adds a burst of delicious fruitiness but also creates a beautiful visual element.
Instructions:
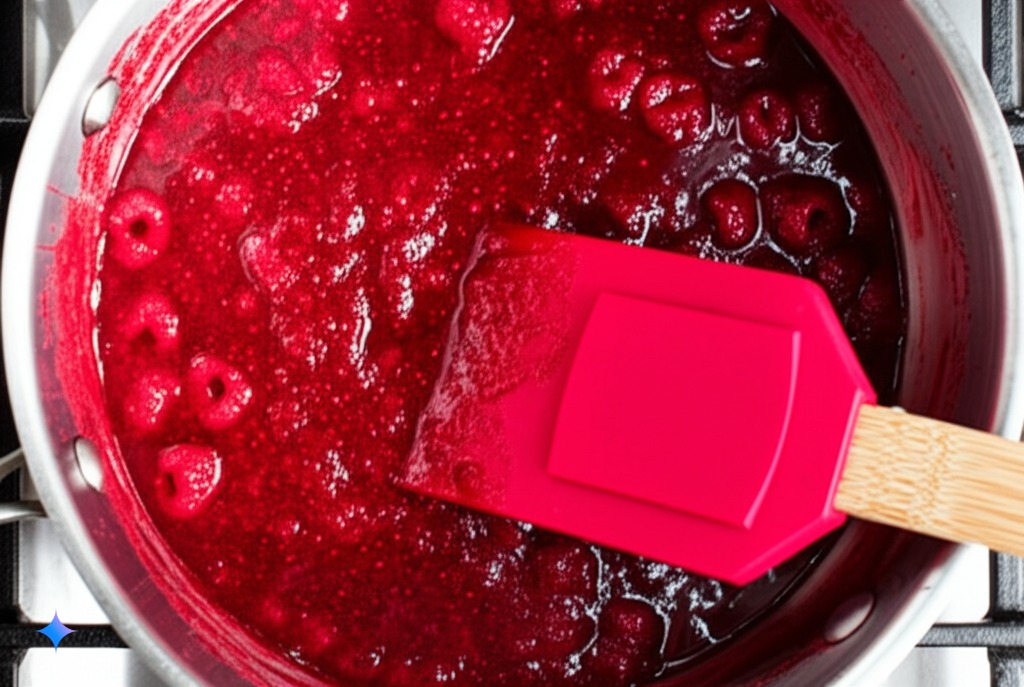
- Combine Raspberries and Sugar: In a small saucepan, combine the fresh (or thawed and drained) raspberries and granulated sugar.
- Cook Down the Berries: Cook the mixture over medium heat, stirring occasionally, until the raspberries break down and release their juices. This should take about 5-7 minutes.
- Strain for Smoothness (Optional): If you prefer a seedless puree, pour the raspberry mixture through a fine-mesh sieve, pressing down on the solids with a spoon to extract as much liquid as possible. Discard the seeds. If you don’t mind the seeds, you can skip this step.
- Add Lemon Juice: Stir in the lemon juice. This helps to brighten the flavor of the raspberry puree.
- Cool Completely: Allow the raspberry puree to cool completely before swirling it into the cheesecake filling. Warm puree can melt the cheesecake batter and affect its texture.
Flavor Variation: Feel free to experiment with other berries like blueberries, strawberries, or blackberries for a different twist!
Step 6: The Swirl and Bake – Creating the Raspberry Bliss
Now for the fun part – combining the creamy filling with the vibrant raspberry puree to create that signature swirl!
Instructions:
- Pour the Filling: Pour the cheesecake filling evenly over the chilled graham cracker crust in the springform pan.
- Dollop the Puree: Spoon the cooled raspberry puree evenly over the top of the cheesecake filling.
- Create the Swirl: Use a knife or a thin skewer to gently swirl the raspberry puree into the cheesecake filling. Don’t over-swirl, as this can muddy the colors. Aim for a beautiful marbled effect.
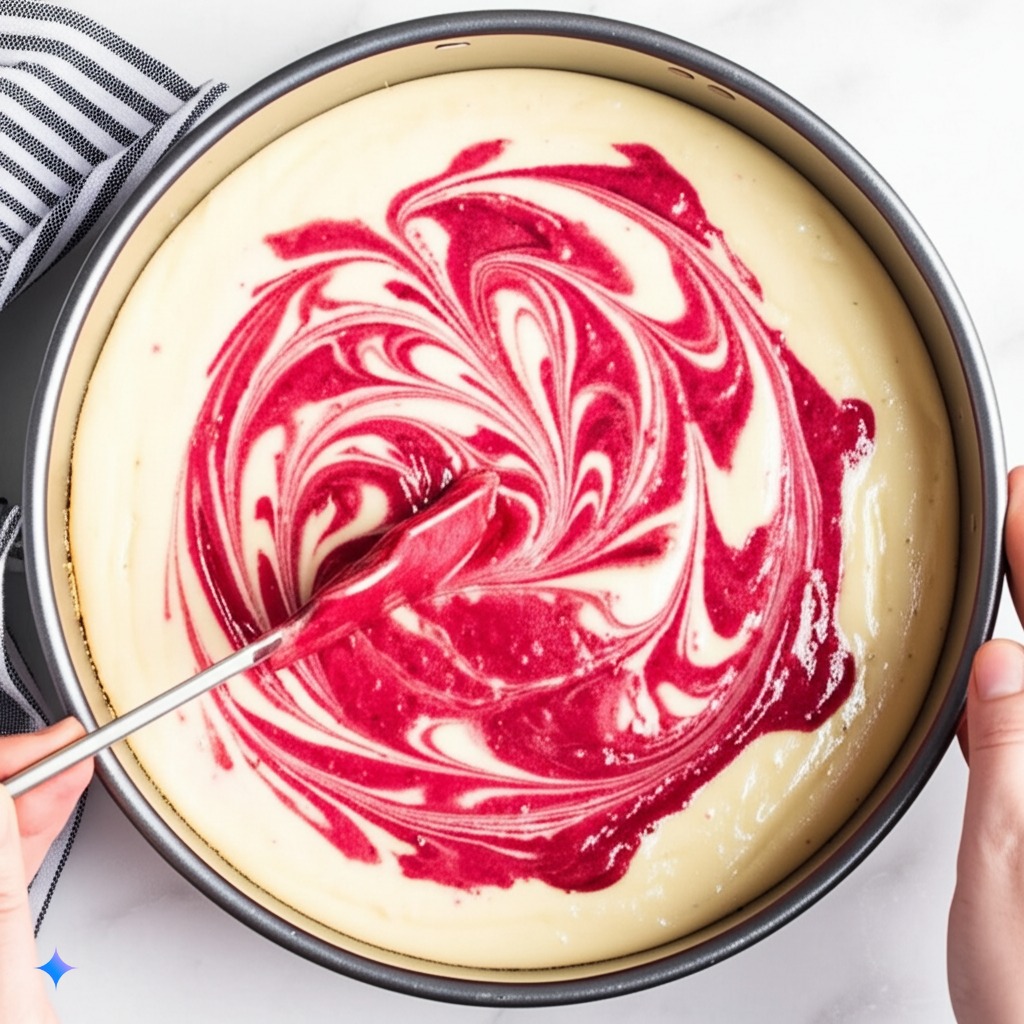
Swirling Secrets: For a more intricate swirl pattern, try making concentric circles with the raspberry puree and then dragging a knife from the center outwards (or inwards) to create a starburst effect.
Step 7: The Water Bath Ritual – Preventing Cracks and Ensuring Creaminess
The dreaded cracked cheesecake! Fear not, we have a secret weapon: the water bath. Baking your cheesecake in a water bath creates a humid environment that helps it bake evenly and prevents the top from drying out and cracking.
Instructions:
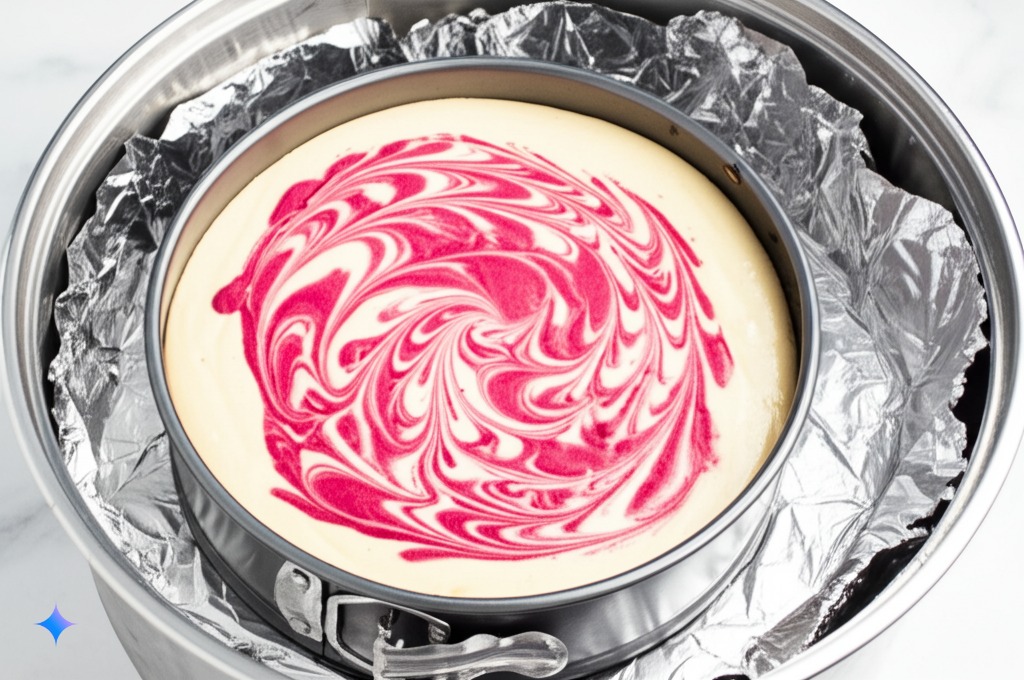
- Wrap the Pan: Wrap the bottom and sides of the springform pan tightly with heavy-duty aluminum foil. This will prevent water from seeping into the crust. You might need to use two layers to be safe.
- Prepare the Water Bath: Place the wrapped springform pan inside a larger roasting pan or baking dish.
- Add Hot Water: Carefully pour hot water into the outer pan, reaching about halfway up the sides of the springform pan. Be cautious not to splash any water onto the cheesecake filling.
Water Bath Wisdom: Make sure the water you use is hot. This will help maintain a consistent temperature in the oven.
Step 8: The Bake – Patience is a Virtue (Especially with Cheesecake)
Now it’s time to bake our Raspberry Bliss Cheesecake to golden perfection! Resist the urge to open the oven door frequently, as this can cause temperature fluctuations that can lead to cracks.
Instructions:
- Preheat Your Oven: Preheat your oven to 325°F (160°C).
- Bake the Cheesecake: Carefully place the roasting pan with the cheesecake and water bath into the preheated oven. Bake for approximately 60-75 minutes, or until the edges of the cheesecake are set and the center jiggles slightly when gently nudged. The exact baking time may vary depending on your oven.
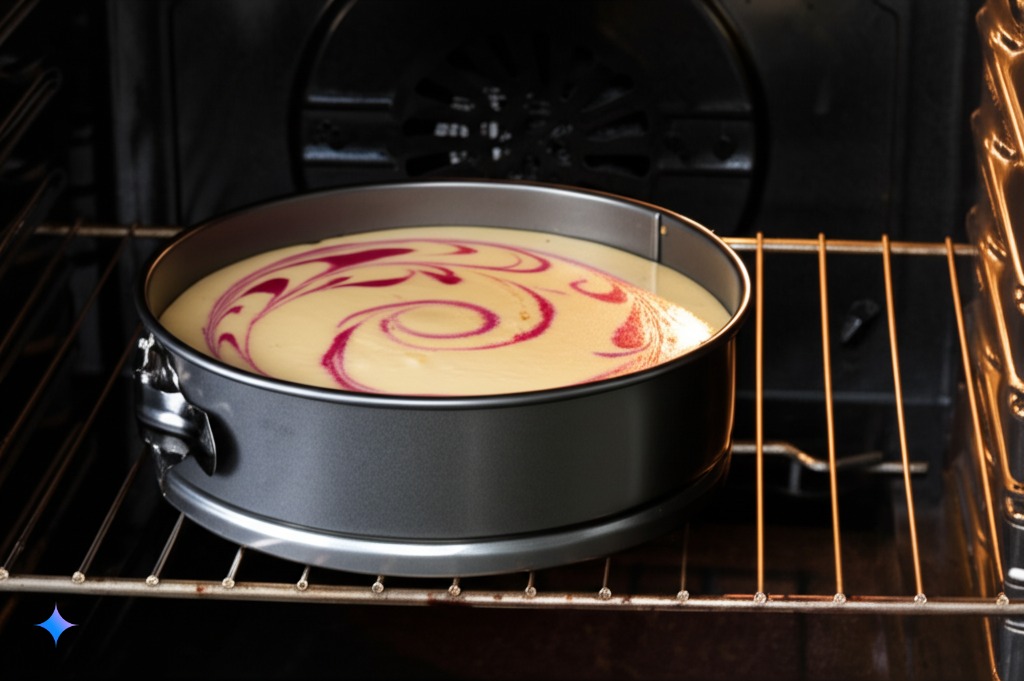
Doneness Check: The center of the cheesecake should still have a slight wobble. It will continue to set as it cools.
Step 9: The Cooling Symphony – A Crucial Step for Texture and Flavor
This step is just as important as the baking itself! Gradual cooling prevents the cheesecake from cracking and allows the flavors to meld together beautifully.
Instructions:
- Turn Off the Oven: Once the baking time is complete, turn off the oven and prop the oven door slightly open with a wooden spoon or oven mitt. Let the cheesecake sit in the cooling oven for 1 hour. This gradual temperature change helps prevent cracking.
- Remove from Water Bath: Carefully remove the roasting pan from the oven and take the springform pan out of the water bath. Remove the aluminum foil from the sides of the springform pan.
- Cool to Room Temperature: Let the cheesecake cool on a wire rack until it reaches room temperature. This will take another 2-3 hours.
- Chill in the Refrigerator: Once cooled to room temperature, cover the springform pan with plastic wrap and refrigerate the cheesecake for at least 6 hours, or preferably overnight. This chilling time is essential for the cheesecake to fully set and develop its rich flavor and creamy texture.
Patience Pays Off: I know it’s tempting to dig in as soon as it’s out of the oven, but trust me, the wait is worth it! A well-chilled cheesecake has a superior texture and flavor.
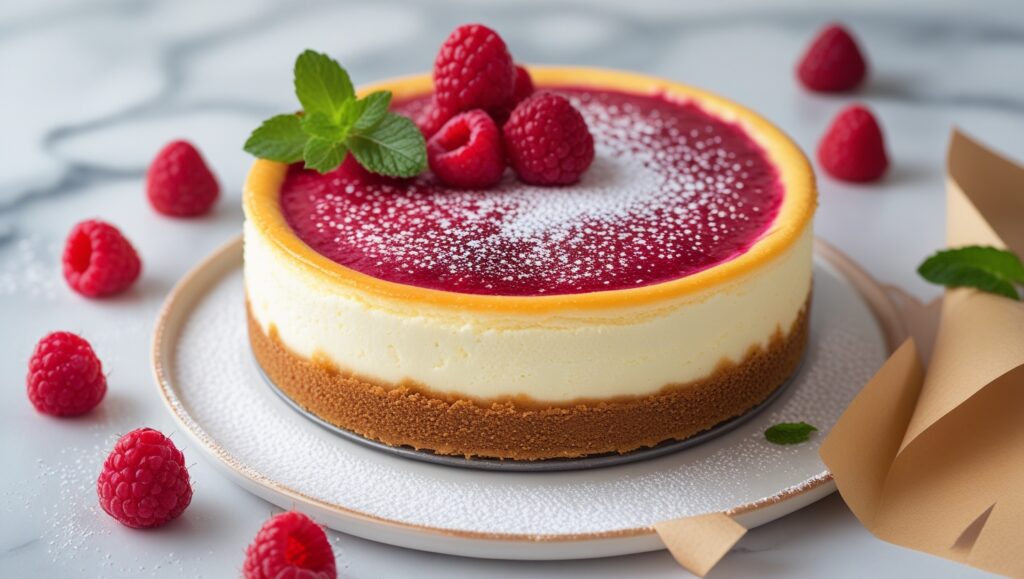
Step 10: Unmolding and Adornment – The Grand Finale
The moment we’ve all been waiting for! It’s time to reveal your beautiful Raspberry Bliss Cheesecake and add those final touches that make it truly irresistible.
Instructions:
- Release the Springform Pan: Once the cheesecake is thoroughly chilled, carefully release the sides of the springform pan.
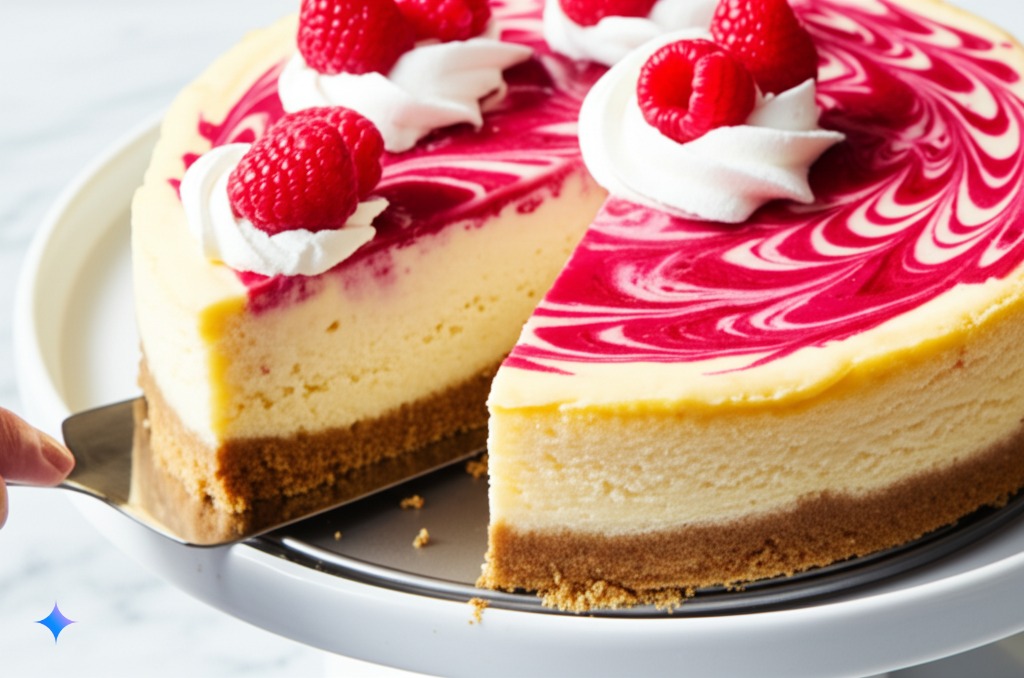
- Garnish (Optional): Now for the fun part – decorating! You can keep it simple with a scattering of fresh raspberries, a dollop of whipped cream, or a light sprinkle of graham cracker crumbs. For a more elegant look, you can create a decorative pattern with the raspberries or drizzle with a little extra raspberry sauce.
Presentation Power: The way you present your cheesecake can elevate the entire experience. Use a pretty cake stand and take your time with the garnish.
Step 11: Slicing and Serving – Time to Indulge!
The final, and arguably the most important, step – savoring the fruits (or should I say, berries?) of your labor!
Instructions:
- Slice Carefully: Use a clean, sharp knife to slice the cheesecake. For neat slices, you can dip the knife in hot water and wipe it clean between each cut.
- Serve and Enjoy: Serve your Raspberry Bliss Cheesecake chilled and prepare for the compliments to roll in!

Serving Suggestions: This Raspberry Bliss Cheesecake is perfect on its own, but you can also serve it with extra fresh raspberries, a drizzle of raspberry sauce, or a scoop of vanilla ice cream for an extra touch of decadence.
Troubleshooting Your Raspberry Bliss Cheesecake: Common Issues and Solutions
Even the most seasoned bakers can encounter a few bumps in the road. Here are some common cheesecake issues and how to fix them:
- Cracked Top: This is the most common cheesecake woe. Prevention is key!
- Solution: Use a water bath, avoid overmixing the batter (especially after adding eggs), and allow the cheesecake to cool gradually in the oven. If it does crack, don’t despair! You can often hide minor cracks with your raspberry swirl or garnish.
- Lumpy Filling: This usually happens when the cream cheese isn’t properly softened.
- Solution: Ensure your cream cheese is at room temperature before you start beating it. Beat it on medium speed until it’s completely smooth before adding other ingredients. If you still have lumps, try using an immersion blender (carefully!) to smooth out the batter.
- Soggy Crust: This can occur if the crust isn’t pressed firmly enough or if water seeps into the pan during the water bath.
- Solution: Press the graham cracker crumbs firmly and evenly into the pan. Wrap the springform pan tightly with aluminum foil to create a watertight seal for the water bath.
- Uneven Baking: This can result in a cheesecake that’s overcooked on the edges and undercooked in the middle.
- Solution: Ensure your oven temperature is accurate. You can also try rotating the cheesecake halfway through baking. The water bath also helps with even baking.
- Raspberry Swirl Sinks: Sometimes the raspberry puree can sink to the bottom.
- Solution: Make sure your raspberry puree has cooled completely before swirling it into the batter. A slightly thicker puree is also less likely to sink. Don’t make the swirl too deep.
Tips for Cheesecake Success: Your Secret Baking Weapons
Want to take your Raspberry Bliss Cheesecake Recipe to the next level? Here are a few extra tips and tricks:
- Use Full-Fat Cream Cheese: For the richest and creamiest texture, always use full-fat cream cheese. Reduced-fat versions can sometimes result in a less smooth and less flavorful cheesecake.
- Don’t Overbake: Overbaking is a common cause of dry and cracked cheesecakes. The center should still have a slight wobble when it’s done.
- Chill Thoroughly: Resist the urge to slice into your cheesecake before it’s fully chilled. This allows it to set properly and develop its optimal texture and flavor.
- Get Creative with the Crust: While graham crackers are classic, you can experiment with other cookie crumbs like Oreos, vanilla wafers, or even gingersnaps for a different flavor profile.
- Make Mini Cheesecakes: This recipe can easily be adapted to make individual mini cheesecakes using a muffin tin lined with paper liners. Adjust the baking time accordingly (they will bake much faster).
- Freezing for Later Bliss: Leftover cheesecake (if there is any!) freezes beautifully. Wrap individual slices tightly in plastic wrap and then in aluminum foil. Thaw them in the refrigerator overnight.
Raspberry Bliss Cheesecake Recipe: A Dessert for Every Occasion
This Raspberry Bliss Cheesecake isn’t just a dessert; it’s an experience. The creamy texture, the tangy raspberry swirl, the satisfying crunch of the graham cracker crust – it’s a symphony of sensations that will delight your taste buds and impress your guests.
Whether you’re celebrating a special occasion, hosting a dinner party, or simply craving a truly indulgent treat, this cheesecake is the perfect choice. And with this comprehensive guide, you have all the tools and knowledge you need to create a masterpiece in your own kitchen.
Remember to share your delicious creations with friends and family (and maybe even snap a photo for social media!). Happy baking, and may your days be filled with Raspberry Bliss!